Discover the best way to clean top of kitchen cabinets and keep your kitchen looking fresh. This guide covers everything from essential supplies to step-by-step cleaning methods for wood, laminate, and painted surfaces. You’ll learn how to remove stubborn grease, avoid common mistakes, and maintain clean cabinets long-term with minimal effort.
Let’s be honest. The top of kitchen cabinets is one of those places we all forget. It sits up high, out of sight, and collects dust, grease, and grime month after month. You might not notice it at first. But one day you run your hand along the top edge and feel a sticky, gritty layer of buildup. That’s when it hits you — it’s time to tackle this forgotten spot.
How to clean top of kitchen cabinets doesn’t have to be a dreaded chore. With the right approach, the right tools, and a little know-how, you can make those high surfaces shine like new. This guide walks you through every step in detail. Whether your cabinets are wood, laminate, or painted, you’ll find practical advice that actually works. Let’s get started.
Key Takeaways
- Dust and grease build up fast on top of kitchen cabinets, making regular cleaning essential for hygiene and appearance.
- Gather the right supplies first — microfiber cloths, a extendable duster, gentle cleaner, and warm water make the job easier.
- Follow a step-by-step process to safely and effectively remove grime without damaging cabinet surfaces.
- Different materials need different care — wood, laminate, and painted cabinets each require specific cleaning approaches.
- Avoid common mistakes like using harsh chemicals, soaking cloths, or skipping protective measures.
- Prevent future buildup with simple habits and a consistent cleaning schedule.
- Clean every 3 to 6 months for best results and a consistently fresh kitchen.
📑 Table of Contents
- Why Cleaning the Top of Kitchen Cabinets Matters
- What You’ll Need: Supplies and Tools
- Step-by-Step Guide to Clean Top of Kitchen Cabinets
- How to Handle Different Cabinet Materials
- Common Mistakes to Avoid When Cleaning Kitchen Cabinets
- Keeping the Top of Cabinets Clean Long-Term
- Expert Insights on Cabinet Maintenance
- Conclusion
Why Cleaning the Top of Kitchen Cabinets Matters
The Hidden Dust and Grease Problem
Here’s something most people don’t realize. The top of kitchen cabinets acts like a magnet for dust and cooking grease. Every time you cook, tiny grease particles float upward and settle on every available surface. Over weeks and months, this layer thickens. What starts as a light dusting turns into a sticky film that attracts more dirt.
In a warm kitchen, this grime can become even worse. Heat causes grease to soften and cling to surfaces. Humidity makes dust clump together. Before long, the top of your cabinets looks dull and dirty. This buildup doesn’t just look bad. It can also affect your kitchen’s overall cleanliness and air quality.
Regular kitchen cabinet cleaning prevents this cycle. When you stay on top of things — literally — you stop grime from building up to the point where it requires heavy scrubbing. A little maintenance goes a long way.
How Neglect Affects Kitchen Hygiene
Dust and grease on cabinet tops aren’t just an eyesore. They can impact your kitchen’s hygiene. Dust particles carry allergens, pet dander, and bacteria. When these settle on high surfaces, they can eventually fall onto countertops, food prep areas, and even dishes. This creates a cycle of contamination that affects your entire kitchen.
For families with allergies or asthma, this is especially important. Clean kitchen hygiene starts from the top down. When you address those hard-to-reach areas, you create a healthier environment for everyone in your home. Plus, a clean kitchen simply feels more inviting and organized.
What You’ll Need: Supplies and Tools
Essential Cleaning Supplies
Before you climb up and start cleaning, make sure you have everything you need. Gathering supplies first saves time and frustration. Here’s what you’ll want on hand:
- Microfiber cloths — These are gentle on all cabinet surfaces and trap dust effectively without leaving lint behind.
- Extendable dusting wand or long-handled duster — You need something that can reach the high surfaces without a ladder every time.
- Warm water — The simplest and gentlest cleaning base for most cabinet types.
- Mild dish soap — A few drops in warm water create a safe, effective cleaning solution.
- White vinegar — A natural degreaser that cuts through kitchen grime without harsh chemicals.
- Baking soda — Great for tackling stubborn stains and sticky residue on cabinet surfaces.
- Spray bottle — For mixing and applying your cleaning solution evenly.
- Soft-bristle brush or old toothbrush — Perfect for getting into corners, edges, and around cabinet hardware.
- Step stool or small ladder — Safety first. Use a stable, non-slip surface to reach high areas.
Helpful Extras That Make the Job Easier
A few extra items can turn a tedious cleaning session into something much smoother. Consider keeping these nearby:
- Rubber gloves — Protect your hands from cleaning solutions and hot water.
- Old towels or drop cloths — Lay these below your work area to catch drips and falling dirt.
- Furniture polish (for wood cabinets only) — Adds a protective shine after cleaning.
- Cabinet hardware polish — Keeps knobs and pulls looking polished and fingerprint-free.
- A flashlight or headlamp — Lets you spot hidden grime and sticky spots you might otherwise miss.
Quick Tip: Before you start, remove any items stored on top of your cabinets. Wipe them separately and give the shelf a quick dust before you begin cleaning the cabinet surface itself.
Step-by-Step Guide to Clean Top of Kitchen Cabinets
Step 1: Preparation and Safety First
Safety matters, especially when you’re working above your head. Start by setting up your step stool or ladder on a flat, stable surface. Make sure it feels secure before you step up. Never stand on chairs or unstable surfaces — this is one of the most common causes of home accidents during cleaning.
Next, clear the top of your cabinets completely. Remove any items, jars, or decorative pieces. Place them on a clean towel or counter nearby. This gives you full access to every surface and prevents anything from falling or getting damaged during the cleaning process.
Lay old towels or a drop cloth on the counter below. This catches any drips, dust, or cleaning solution that falls from above. It keeps your countertops clean and saves you extra cleanup later.
Step 2: Dry Dust the Entire Surface
Always start with dry dusting before you introduce any moisture. Use your extendable duster or a microfiber cloth wrapped around a long-handled tool. Work from one end of the cabinet row to the other, using long, sweeping motions.
Don’t press too hard. The goal is to lift loose dust and particles off the surface. Let the cloth or duster do the work. If you’re using a microfiber cloth, fold it several times so you always have a clean surface against the cabinet.
Pay special attention to the edges and corners where dust tends to accumulate. Use a soft-bristle brush or an old toothbrush to gently clean around cabinet hardware, hinges, and any decorative trim pieces. These small areas often hold the most buildup.
Step 3: Apply Your Cleaning Solution
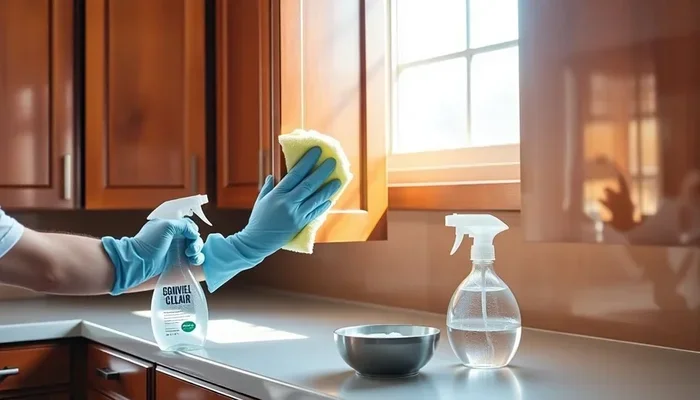
Now it’s time to tackle the grime. Mix a gentle cleaning solution in your spray bottle. For most cabinet types, a simple mix works great:
- 1 cup of warm water
- 2-3 drops of mild dish soap
- 1 tablespoon of white vinegar
Shake the bottle gently to combine. Spray the solution onto a microfiber cloth — not directly onto the cabinet. This prevents excess moisture from seeping into seams, edges, or unfinished areas. Too much water can damage wood finishes and cause swelling or warping over time.
Wipe the cabinet surface in gentle, circular motions. Work in small sections so the cleaning solution doesn’t dry before you can wipe it away. Use a clean, damp section of cloth to rinse each area, then dry immediately with a separate dry cloth.
Step 4: Tackle Stubborn Grease and Sticky Residue
Some areas will have more buildup than others. Near the stove or cooking area, grease tends to be heavier. You may notice sticky residue that won’t come off with soap and water alone. Here’s how to handle it:
- Make a paste with baking soda and water. Mix about 3 tablespoons of baking soda with just enough water to form a thick paste.
- Apply the paste to the stubborn spot. Let it sit for 5-10 minutes. The baking soda will break down the grease naturally.
- Gently scrub with a soft cloth or toothbrush. Use light pressure and circular motions. Don’t use abrasive pads or scrubbers — they can scratch the cabinet finish.
- Wipe clean with a damp cloth. Then dry the area thoroughly with a separate dry cloth.
For extremely greasy areas, you can also try a dedicated grime removal spray designed for kitchen surfaces. Just make sure it’s safe for the type of cabinet finish you have. Always test on a small, hidden area first.
Step 5: Dry and Protect the Surface
Once you’ve cleaned the entire surface, go over it one more time with a dry microfiber cloth. This removes any remaining moisture and prevents water spots. For wood cabinets, this is especially important because trapped moisture can cause damage over time.
If your cabinets are wood, now is a great time to apply a thin layer of furniture polish. This adds a protective barrier and gives the surface a beautiful, subtle shine. Use a clean cloth and apply in the direction of the wood grain. Less is more — a little polish goes a long way.
For laminate or painted cabinets, you can skip the polish. Instead, consider applying a thin coat of car wax. This creates a protective layer that repels dust and grease, making future cleaning routines much easier.
How to Handle Different Cabinet Materials
Not all kitchen cabinets are the same. The material your cabinets are made from determines the best cleaning approach. Using the wrong method can damage the finish, strip away paint, or leave permanent marks. Here’s how to handle the most common cabinet materials.
Wood Cabinets
Wood cabinets are beautiful but require careful treatment. They’re sensitive to excess moisture, harsh chemicals, and abrasive cleaning tools. Always use a damp — never wet — cloth when cleaning wood surfaces. Stick to mild soap and water or a dedicated wood cleaner.
Avoid products that contain ammonia, bleach, or silicone. These can dull the finish or cause discoloration over time. If your wood cabinets have a lacquered or varnished finish, be extra gentle. The finish protects the wood underneath, and scratching it exposes the surface to moisture and damage.
For unfinished or antique wood cabinets, use the mildest solution possible — just warm water with a tiny drop of dish soap. Dry the surface immediately after cleaning. Consider applying a wood-safe conditioner every few months to keep the wood hydrated and looking its best.
Laminate Cabinets
Laminate cabinets are more durable and resistant to moisture than wood. They can handle a slightly stronger cleaning solution without damage. However, they’re not indestructible. Avoid abrasive scrubbers and steel wool, which can scratch the laminate surface.
For everyday cleaning, warm soapy water works perfectly. For grease buildup, the baking soda paste method works well on laminate too. Just be sure to rinse thoroughly and dry the surface completely. Standing water can seep into the edges of laminate and cause peeling or swelling over time.
Painted Cabinets
Painted cabinets add a pop of color and personality to any kitchen. But paint is more vulnerable to damage than other finishes. Use only the mildest cleaning solutions and always test in an inconspicuous spot first. Avoid anything acidic — like undiluted vinegar or lemon juice — as these can strip paint over time.
When drying painted cabinets, pat gently rather than rubbing. Vigorous rubbing can wear away the paint finish, especially on edges and corners. If your painted cabinets start to look dull after cleaning, a light coat of clear wax can restore the shine without altering the color.
Common Mistakes to Avoid When Cleaning Kitchen Cabinets
Using the Wrong Cleaning Products
This is the number one mistake people make when tackling kitchen cabinet cleaning. Harsh chemical cleaners, abrasive sprays, and heavy-duty degreasers can strip away cabinet finishes. They may clean the surface in the short term but cause long-term damage that’s costly to repair.
Always check the label of any cleaning product before using it on your cabinets. Look for gentle, pH-neutral formulas. When in doubt, stick with warm water, mild dish soap, and white vinegar. These simple ingredients handle 95% of cabinet cleaning tasks safely and effectively.
Using Too Much Water
Excess moisture is the enemy of kitchen cabinets, especially wood. Soaking a cloth and then wiping down cabinets might feel thorough, but it leaves behind water that can seep into seams, joints, and unfinished areas. Over time, this causes swelling, warping, and even mold growth.
The trick is to use a lightly damp cloth — wrung out until it’s just barely moist. Wipe the surface and then immediately dry it with a separate cloth. Your cabinets should never feel wet after cleaning.
Skipping Regular Maintenance
Many people only clean the top of their kitchen cabinets when the buildup becomes unbearable. By that point, the job takes much longer and requires more elbow grease. Regular maintenance makes the entire process faster and easier.
Set a reminder to do a quick dusting every month or two. This takes just 10-15 minutes and prevents the heavy buildup that requires deep cleaning. A little consistency saves a lot of effort in the long run.
Keeping the Top of Cabinets Clean Long-Term
Prevention Tips That Really Work
Prevention is the best strategy for maintaining clean cabinets. Here are some simple habits that make a big difference:
- Cook with your range hood on. This captures grease and steam before they float up to your cabinet tops.
- Wipe down kitchen surfaces after cooking. A quick wipe of countertops and backsplash reduces the overall grease level in your kitchen.
- Use a splatter screen when frying. This keeps grease particles from reaching high surfaces in the first place.
- Keep a small broom or handheld vacuum near your kitchen. Quick dusting becomes easier when the tools are within reach.
- Store items thoughtfully on top of cabinets. Avoid placing open containers or items that collect dust up there. Closed storage bins work much better.
How Often Should You Clean?
The frequency of cleaning depends on how much you cook and the layout of your kitchen. As a general rule:
- Quick dusting: Every 1-2 months
- Full cleaning session: Every 3-6 months
- Deep clean after remodeling or renovations: Once, before replacing items on top of cabinets
If you cook frequently or have a gas stove, you may need to clean more often. The same goes for homes with pets, smokers, or high humidity levels. Pay attention to how quickly grime builds up in your kitchen and adjust your schedule accordingly.
Expert Insights on Cabinet Maintenance
Professional cleaners and kitchen designers agree on a few key principles when it comes to maintaining clean cabinets. Here’s what the experts have to say:
- Start from the top and work down. This prevents dust and grime from falling onto already-cleaned surfaces. It’s the golden rule of kitchen cleaning.
- Invest in quality microfiber cloths. They’re more effective than cotton rags and can be washed and reused hundreds of times.
- Don’t forget the back sides of cabinets. If cabinets are against an exterior wall, the back can collect dust and moisture. Occasional wiping back there prevents mold and mildew.
- Check cabinet hardware regularly. Loose hinges or handles can create gaps where dirt accumulates. Tighten hardware every few months as part of your cabinet maintenance routine.
- Consider removable shelf liners. If you store items on top of cabinets, placing liners underneath makes cleanup faster and easier. Just lift, wipe, and replace.
These small habits might seem minor, but they compound over time. A little effort each month keeps your kitchen looking its best and extends the life of your cabinets significantly.
Conclusion
How to clean top of kitchen cabinets doesn’t have to be complicated or time-consuming. With the right supplies, a clear process, and a little consistency, you can keep those high surfaces spotless and your kitchen looking its best. The key is to stay proactive — dust regularly, clean gently, and avoid harsh products that do more harm than good.
Remember, every cabinet material has its own needs. Wood, laminate, and painted cabinets each respond best to specific cleaning approaches. Take the time to understand what works for yours, and the results will speak for themselves. Your kitchen will feel fresher, look cleaner, and stay healthier for everyone in your home.
Start with the tips in this guide today. Even a single cleaning session makes a noticeable difference. And once you see how easy it is to maintain, you’ll wonder why you ever let that buildup go so long. Your cabinets — and your kitchen — will thank you.
Frequently Asked Questions
What is the best way to clean top of kitchen cabinets?
The best approach starts with dry dusting using an extendable duster or microfiber cloth. Follow up with a gentle cleaning solution of warm water, mild dish soap, and a splash of white vinegar. Wipe with a damp cloth and dry immediately. This method works safely on most cabinet materials and prevents damage from excess moisture or harsh chemicals.
How often should I clean the top of my kitchen cabinets?
A quick dusting every 1-2 months keeps buildup under control. A full deep cleaning session every 3-6 months is ideal for most kitchens. If you cook frequently or live in a humid area, you may need to clean more often. Consistency is key — regular light cleaning prevents the need for heavy scrubbing later.
Can I use vinegar to clean kitchen cabinets?
Yes, white vinegar is a safe and effective natural cleaner for most cabinet types. Mix one tablespoon of vinegar with warm water and a few drops of mild dish soap. However, avoid using undiluted vinegar on painted or delicate surfaces, as the acidity can cause damage over time. Always test in a small hidden area first.
What cleaning products should I avoid on kitchen cabinets?
Avoid products containing ammonia, bleach, abrasive compounds, or heavy-duty degreasers. These can strip cabinet finishes, discolor surfaces, or cause long-term damage. Also stay away from paper towels for wood cabinets, as they can leave behind lint and scratch delicate surfaces. Stick to microfiber cloths and gentle, pH-neutral cleaners.
How do I remove sticky grease from kitchen cabinet tops?
Make a paste from three tablespoons of baking soda and a small amount of water. Apply it to the sticky area and let it sit for 5-10 minutes. Gently scrub with a soft cloth or old toothbrush using circular motions. Wipe clean with a damp cloth and dry thoroughly. For heavy grease near the stove, repeat the process if needed.
Is it safe to use a ladder to clean top of kitchen cabinets?
Yes, as long as you take proper precautions. Use a stable, non-slip step stool or small ladder placed on a flat surface. Never stand on chairs, counters, or unstable surfaces. Keep your belt buckle between the ladder rails and maintain three points of contact at all times. If your cabinets are especially high, consider an extendable duster for routine dusting so you don’t need to climb as often.
=== URL SLUG ===
/how-to-clean-top-of-kitchen-cabinets
=== SEO TITLE ===
How to Clean Top of Kitchen Cabinets Like a Pro
=== META TITLE ===
How to Clean the Top of Kitchen Cabinets Like a Pro
=== SEO META DESCRIPTION ===
Learn how to clean top of kitchen cabinets with our step-by-step guide. Discover pro tips, best tools, and simple solutions for a spotless, fresh kitchen. Start today!