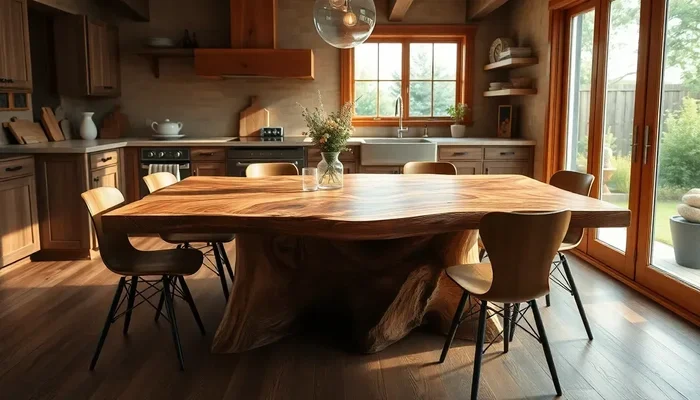
Installing laminate flooring in your kitchen is one of the most rewarding DIY home projects you can tackle. This guide walks you through every step, from choosing the right planks to finishing the last row. You will learn how to prep your subfloor, lay underlayment, and lock planks together like a pro.
Follow our simple instructions and transform your kitchen floor in just one weekend.
Key Takeaways
- Plan Before You Start: Measure your kitchen, choose the right laminate, and gather all tools before beginning.
- Prep Is Everything: A clean, level subfloor ensures your laminate flooring installation lasts for years.
- Acclimate Your Planks: Let laminate sit in the room for 48 hours to prevent buckling or gaps later.
- Leave Expansion Gaps: Always leave a 10mm gap around the edges to allow for natural movement.
- Use the Right Underlayment: Quality underlayment reduces noise, adds comfort, and protects against moisture.
- Work in Sections: Install plank by plank using the click-lock system for a secure, floating floor.
- Maintain Your Floors: Simple cleaning habits keep your kitchen laminate flooring looking new for decades.
📑 Table of Contents
- How to Install Laminate Flooring in Your Kitchen Today
- Why Choose Laminate Flooring for Your Kitchen
- Gather Your Tools and Materials
- Prepare Your Kitchen for Installation
- Step-by-Step Installation Process
- Common Mistakes to Avoid
- Expert Tips for a Flawless Finish
- Maintaining Your New Kitchen Floor
- Further Reading
- Conclusion
How to Install Laminate Flooring in Your Kitchen Today
Are you tired of looking at outdated or damaged kitchen floors? laminate flooring installation might be the perfect solution. It looks like real hardwood or stone, but it costs a fraction of the price. Plus, it is durable enough to handle the heavy foot traffic and spills that come with any busy kitchen.
Whether you are a seasoned DIYer or a complete beginner, this guide will show you exactly how to do it right. We will cover everything from picking out your laminate planks to the final sweep. By the end, you will feel confident enough to start your kitchen renovation this weekend.
DIY flooring projects have become incredibly popular, and for good reason. They save you money and give you complete control over the look and feel of your home. Kitchen floor repair or a full replacement can dramatically change the mood of your entire cooking space. Let us dive into the process step by step.
Why Choose Laminate Flooring for Your Kitchen
Laminate flooring has grown in popularity for many good reasons. It is versatile, affordable, and surprisingly tough. For a kitchen makeover, few flooring options deliver as much value.
Durability and Style
Modern laminate is designed to handle scratches, stains, and heavy use. The top layer is a clear protective coating that shields the design underneath. You can find laminate flooring that mimics oak, marble, or even tile. This means you get the look you want without the high maintenance.
Cost Savings
Compared to hardwood or natural stone, laminate flooring cost is much lower. A typical kitchen project can save you hundreds of dollars. You also save on installation since you can do it yourself. Over time, laminate holds up well and requires minimal upkeep.
Easy Maintenance
Spilled coffee? No problem. Laminate floors wipe clean in seconds. Unlike carpet, they do not trap dust or allergens. This makes them a great choice for families and pet owners alike.
Gather Your Tools and Materials
Before you start any laminate flooring installation, make sure you have everything you need. Being prepared saves time and prevents frustrating delays mid-project.
Essential Tools
- Tape measure for accurate room dimensions
- Pull bar to snug planks together
- Rubber mallet for tapping planks into place
- Utility knife for cutting planks to size
- Circular saw or hand saw for straight cuts
- Spacer blocks to maintain expansion gaps
- Level to check subfloor flatness
- Pencil and chalk line for layout marking
Materials You Will Need
- Laminate planks (order 10% extra for cuts and mistakes)
- Underlayment (foam, cork, or combined pad)
- Transition strips for doorways and room edges
- Floor adhesive (only if needed for specific installations)
- Baseboard trim or quarter-round molding
Prepare Your Kitchen for Installation
Proper preparation is the most important part of any laminate flooring project. Skipping this step often leads to problems down the road. Take your time here, and the rest of the process will go smoothly.
Check Your Subfloor
Your subfloor needs to be clean, dry, and level. Sweep up all debris and vacuum any dust. If the surface is uneven, use a self-leveling compound to smooth it out. A floating floor like laminate will show every bump and dip underneath, so this step matters.
Acclimate the Planks
Bring your laminate planks into the kitchen at least 48 hours before installation. Leave them stacked in the room so they adjust to the temperature and humidity. This process, called flooring acclamation, prevents the planks from expanding or contracting after installation.
Plan Your Layout
Decide which direction to lay the planks. Most experts recommend running planks parallel to the longest wall or the main light source. Use your chalk line to snap a straight reference line. This keeps your first row perfectly straight, which sets the tone for the entire floor.
Step-by-Step Installation Process
Now comes the fun part. Laying laminate flooring in your kitchen is easier than most people think. Follow these steps carefully, and you will have a beautiful new floor in no time.
Step 1: Install the Underlayment
Roll out your flooring underlayment across the entire kitchen floor. This layer serves multiple purposes. It provides cushioning, reduces noise, and creates a moisture barrier. Tape the seams together with underlayment tape so the layers stay in place. For kitchens prone to moisture, consider a moisture-resistant underlayment with a built-in vapor barrier.
Step 2: Lay the First Row
Start in the corner of the room. Place the first plank with the tongue side facing the wall. Use your spacer blocks to maintain a 10mm gap along all walls. This flooring expansion gap is critical. Laminate naturally expands and contracts with temperature changes, and without this gap, the planks can buckle.
Stagger the joints between rows. A common rule is to offset end seams by at least 12 inches. This creates a stronger, more natural-looking floor. Think of how brickwork looks, with each row shifted slightly.
Step 3: Click the Planks Together
Most modern laminate flooring uses a click-lock system. Angle the plank at about 30 degrees and slot it into the previous plank. Then press it down until it clicks into place. A pull bar helps tighten the joints, especially near the walls where space is tight.
Avoid forcing planks too hard. If a plank does not click easily, check the angle and try again. Using a rubber mallet with a tapping block protects the edges from damage.
Step 4: Cut Planks as Needed
When you reach the edges of the room, you will need to cut planks to fit. Measure carefully and mark the cut line. Use a circular saw for straight cuts and a jigsaw for curved shapes. Always measure twice and cut once. A wrong cut wastes a plank and can delay your project.
Step 5: Install the Final Row
The last row is often the trickiest. You may need to rip planks lengthwise to fill the remaining space. Measure the width carefully and use your saw to make the cuts. The pull bar is essential here to snug the final rows tightly together.
Step 6: Add Transition Strips and Trim
Once the floor is laid, remove all the spacer blocks. Install transition strips at doorways and where the kitchen meets another room. These strips create a clean, finished look and allow the floor to move freely. Finally, reinstall or replace your baseboard trim to cover the expansion gaps along the walls.
Common Mistakes to Avoid
Even with the best plans, mistakes can happen. Knowing what to avoid saves you time, money, and frustration.
- Skipping acclamation: Never install planks straight from the garage or basement. They need time to adjust to the room conditions.
- Ignoring the expansion gap: Forgetting the 10mm gap is the number one cause of buckling. Always use spacers.
- Laying planks too quickly: Rushing leads to misaligned rows and visible seams. Take your time and check alignment often.
- Using the wrong underlayment: A thin or low-quality pad affects sound reduction and moisture protection. Choose wisely.
- Cutting planks in the wrong place: Always cut from the back side to avoid chipping the decorative surface.
- Forgetting to stagger joints: Unstaggered seams create weak points and an unattractive pattern.
Expert Tips for a Flawless Finish
Laminate flooring installation becomes second nature once you understand a few pro tips. These insights help you achieve a professional-looking result.
First, always keep a few spare planks on hand. You never know when a cut will go wrong or a plank gets damaged during installation. Most manufacturers sell extra boxes, and having them on standby is a lifesaver.
Second, pay attention to the lighting in your kitchen. Natural light reveals imperfections that artificial light hides. Lay planks when the room has plenty of daylight, and walk the floor from different angles to check for raised seams.
Third, use a pull bar with a scrap piece of flooring to protect the edges. This small trick prevents visible dents and keeps your floor looking pristine. It is one of those details that separates a DIY job from a professional one.
Fourth, do not walk on the floor for at least a few hours after installation. This allows the joints to fully set. If you need to move around the kitchen, use soft-soled shoes or walk on cardboard paths.
Finally, keep the room temperature stable during and after installation. Extreme heat or cold can cause the laminate planks to expand or contract unevenly. A comfortable room temperature of around 65 to 75 degrees Fahrenheit is ideal.
Maintaining Your New Kitchen Floor
One of the best things about laminate flooring is how easy it is to maintain. A few simple habits keep your floors looking great for years.
- Sweep or vacuum regularly to remove dirt and grit that can scratch the surface.
- Wipe up spills immediately to prevent moisture from seeping into the seams.
- Use a damp mop with a laminate-safe cleaner. Never soak the floor with water.
- Place felt pads under furniture legs to prevent scratches.
- Use doormats at entry points to trap debris before it reaches the floor.
- Avoid abrasive cleaners or steam mops, which can damage the protective layer.
With proper care, a laminate flooring installation can last 20 years or more. It is a smart investment for any homeowner looking to upgrade their kitchen floor repair or kitchen makeover without breaking the bank.
Further Reading
If you enjoyed learning about laminate flooring installation, check out some of our other home improvement and lifestyle guides. While you are at it, you might want to check out our guide on Greek Salad In A Jar for a quick and healthy lunch you can prep while your floor settles. And if you are in the mood for something warm and comforting, our Eggs In Purgatory recipe is perfect for a cozy dinner after a long day of DIY work. You can also explore more about Greek Salad In A Jar for meal ideas that pair well with your newly renovated kitchen space.
Conclusion
Installing laminate flooring in your kitchen is a project that anyone can do with the right preparation and a little patience. From choosing the perfect planks to clicking the last row into place, every step brings you closer to a stunning new floor. The process is straightforward, the results are beautiful, and the savings are significant.
Remember to take your time with preparation. Acclimate your planks, level your subfloor, and always leave that expansion gap. These small details make all the difference in how long your floor lasts and how good it looks. With the tips and guidance in this article, you have everything you need to succeed.
So grab your tools, clear out the kitchen, and start your laminate flooring installation today. Your dream kitchen floor is closer than you think. Once you finish, you will wonder why you did not do it sooner. Happy installing!
Frequently Asked Questions
How long does it take to install laminate flooring in a kitchen?
Most DIYers complete a standard kitchen floor in one to two days. The time depends on the size of the room and your experience level. Preparation and acclamation add another 48 hours before you start laying planks.
Can laminate flooring be installed over existing kitchen tile?
Yes, in many cases. The existing tile must be clean, dry, level, and in good condition. However, check the manufacturer guidelines first. Some brands recommend removing old flooring for the best results.
Do I need professional help for laminate flooring installation?
No, laminate flooring is one of the most beginner-friendly DIY projects. The click-lock system makes it easy to connect planks without glue or nails. As long as you prepare properly, you can achieve professional-looking results on your own.
What is the best underlayment for kitchen laminate flooring?
A foam or cork underlayment with a moisture barrier works best for kitchens. Since kitchens are prone to spills and humidity, a vapor-resistant pad protects your floor from water damage and also reduces noise.
How do I cut laminate planks without chipping them?
Measure and mark the cut line on the back side of the plank. Use a circular saw with a fine-tooth blade for straight cuts. Score the surface lightly with a utility knife before cutting to minimize chipping along the edges.
Can I install laminate flooring in a kitchen with high moisture levels?
Standard laminate is not waterproof, so high moisture can be a concern. Choose water-resistant laminate or a plank with a sealed core for kitchens with lots of spills. Always wipe up water quickly and avoid soaking the floor when cleaning.