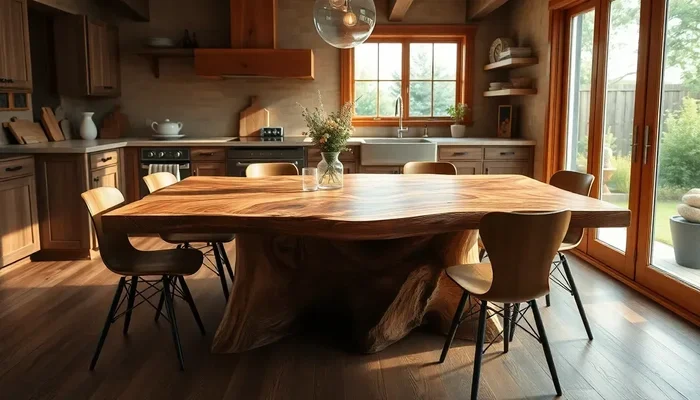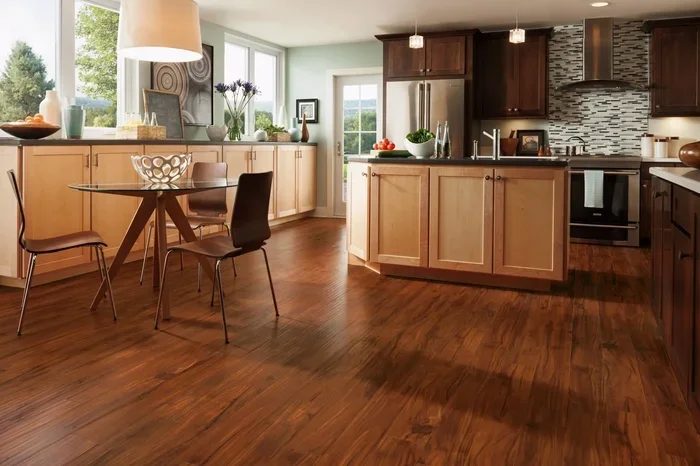
Protecting your hardwood floors in the kitchen starts with the right sealant, smart daily habits, and the best protective mats. Kitchens are the heart of the home, but they are also the biggest threat to beautiful wood floors. With the right hardwood floor protection strategy, you can prevent scratches, water damage, and wear without sacrificing style.
Key Takeaways
- Sealant is your best friend: A quality polyurethane or wax sealant creates a barrier against water, stains, and scratches.
- Daily habits matter most: Simple routines like wiping spills immediately and using floor mats prevent long-term damage.
- Not all mats are equal: Choose durable, non-slip mats placed in high-traffic and spill zones for real protection.
- Humidity control prevents warping: Keeping indoor humidity between 35-55% protects wood from swelling and cracking.
- Refinishing extends floor life: Scheduling professional refinishing every 7-10 years restores the protective layer and beauty.
- Quick action stops damage: The faster you clean spills, especially acidic liquids, the less harm they cause to your finish.
📑 Table of Contents
- Why Kitchen Hardwood Floors Need Extra Protection
- Choose the Right Protective Finish
- Daily Habits That Make a Huge Difference
- Best Kitchen Mats and Rugs for Floor Protection
- Preventing Water Damage and Stains
- Protect Floors During Cooking and Meal Prep
- Control Humidity and Temperature
- When to Refinish Your Kitchen Floors
- Quick Tips for Ongoing Kitchen Floor Care
- Common Mistakes People Make with Kitchen Hardwood Floors
- Final Thoughts on Protecting Kitchen Hardwood Floors
Why Kitchen Hardwood Floors Need Extra Protection
Your kitchen floor takes a beating every single day. Between cooking messes, heavy foot traffic, and accidental spills, hardwood floors in the kitchen face more challenges than almost any other room in the house. The good news? A little prevention goes a very long way.
Water is the number one enemy of wood floors. Even a small puddle left overnight can cause warping, staining, or finish damage. Add cooking grease, acidic ingredients, and heavy pots and pans to the mix, and you have a recipe for disaster. But here is the thing — most damage is completely preventable.
When you take steps to protect hardwood floors in kitchen areas, you are investing in the longevity and beauty of your home. Whether you have fresh hardwood or floors that have been in place for years, these strategies will help you keep them looking great.
Choose the Right Protective Finish
The first line of defense for your kitchen floor is the finish on top of the wood. A quality finish acts as a shield against moisture, scratches, and daily wear. There are several options to consider, and each has its own strengths.
Polyurethane Finish
Polyurethane is the most popular choice for kitchen hardwood floors. It creates a hard, durable layer that resists water and scratches. Oil-based polyurethane adds a warm amber tone to your wood, while water-based versions dry faster and stay clear. Both types work well in high-traffic kitchen areas.
Hard Wax Oil
Hard wax oil soaks into the wood rather than sitting on top. This gives you a natural look and feel while still providing solid protection. The big advantage is that you can spot-repair scratches easily. Many homeowners love this option for kitchens because it blends beauty with practicality.
Lacquer Finish
Lacquer dries to a very hard surface and resists kitchen moisture well. It is often used in commercial kitchens but works beautifully in homes too. The downside is that it requires professional application. If you want maximum protection and do not mind the cost, lacquer is worth considering.
No matter which finish you choose, reapply it on schedule. Most finishes need touch-ups every few years. This keeps the protective coating strong and your floors looking fresh.
Daily Habits That Make a Huge Difference
You do not need a complicated routine to protect your kitchen floors. A few simple daily habits will do most of the heavy lifting. Consistency is what matters most here.
Wipe Spills Immediately
This sounds obvious, but many people let spills sit for just a few minutes too long. Water, coffee, juice, and cooking liquids can penetrate the finish quickly. Keep a microfiber cloth near your kitchen counter so you can grab it fast. The quicker you clean, the less damage occurs.
Use Floor Protectors Under Furniture
Every chair, table, and cabinet leg in your kitchen should have soft felt pads or floor protectors. These prevent scratches when you move furniture. Replace the pads every six months because they wear down over time. This is one of the cheapest and most effective ways to protect hardwood floors in kitchen spaces.
Sweep or Vacuum Daily
Grit, sand, and small crumbs act like sandpaper on your floor finish. A quick sweep or vacuum each morning removes these particles before they cause scratches. Use a soft-bristle broom or a vacuum with a hardwood floor setting. Avoid beater bar vacuums because they can scratch the surface.
Another great habit is to remove shoes before walking on the kitchen floor. Outdoor shoes carry dirt, gravel, and chemicals that wear down the finish fast. Slippers or clean socks are much safer for your wood floors.
Best Kitchen Mats and Rugs for Floor Protection
Mats and rugs are your kitchen floor’s best allies. They absorb impact, catch spills, and reduce wear in the busiest areas. But not all mats are created equal, so you need to choose wisely.
Where to Place Mats
Focus on three key zones in your kitchen:
- The sink area: This is where most water splashes happen. A absorbent mat here catches drips and prevents water from pooling.
- In front of the stove: Cooking splatters and hot oil drops land here. A heat-resistant mat protects against both.
- Entry points to the kitchen: If your kitchen connects to a hallway or dining area, a doormat-style rug traps dirt and moisture before they reach the wood.
What to Look for in a Kitchen Mat
Choose mats that are non-slip on the back so they do not slide around. Look for materials that are waterproof and easy to clean. Natural rubber-backed mats work well because they grip the floor without leaving residue. Avoid mats with rubber backing that is too thick, as they can trap moisture underneath and damage the wood.
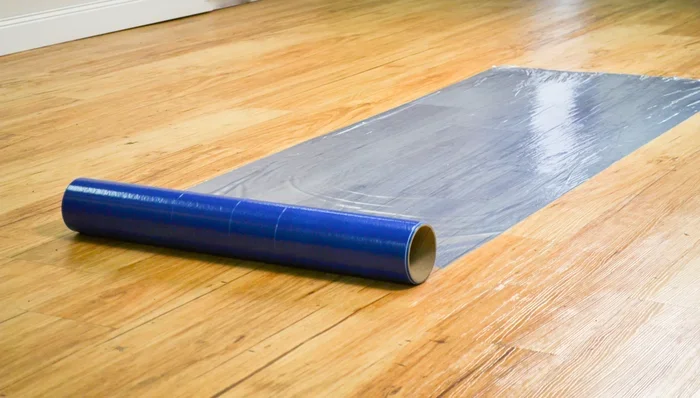
You might also consider protective floor panels that interlock and cover large areas. These are great if you do a lot of cooking or entertaining. They take the brunt of foot traffic and spills so your actual floor stays safe.
Preventing Water Damage and Stains
Water damage is the silent killer of kitchen hardwood floors. It often happens slowly, over weeks or months, before you even notice the problem. By the time you see warping or discoloration, the damage may already be done.
Seal Gaps and Cracks
Check the spaces around your sink, dishwasher, and any floor-level appliances. Even small gaps let water seep underneath the floor. Use caulk or sealant to close these openings. This is especially important around the perimeter of the room where the floor meets the walls.
Clean with the Right Products
Not all floor cleaners are safe for hardwood. Avoid products that contain ammonia, bleach, or excessive water. Instead, use a pH-neutral wood floor cleaner that is specifically formulated for hardwood. Spray it onto a mop or cloth, not directly onto the floor, to control moisture.
When mopping, use as little water as possible. A damp mop is fine, but a soaking wet mop will push water into the wood grain. Wipe the floor dry after cleaning whenever you can.
Handle Stains Quickly
If something spills on your floor, act fast. Blot the liquid with a clean cloth — do not rub, as this spreads the stain. For stubborn marks, a small amount of wood floor cleaner on a soft cloth usually does the trick. Avoid abrasive scrubbers or harsh chemicals.
For tough stains that have already set in, you may need to sand and refinish that spot. This is why prevention matters so much. The less exposure your floor has to potential stains, the longer it stays beautiful.
Protect Floors During Cooking and Meal Prep
Cooking is messy, and there is no way around it. But you can take steps to minimize the impact on your kitchen floor. Simple precautions during meal prep can save you from expensive repairs down the road.
Use a Cutting Board Always
Never chop vegetables or prepare food directly on the kitchen floor. Even if you think you are being careful, knife slips happen. A good cutting board protects both your floor and your knives. This is especially important if you have lighter-colored wood floors, where scratches show up more easily.
Be Careful with Heavy Pots and Pans
Dropping a heavy pot on a hardwood floor can cause dents. Always set pots and pans down gently. Use a trivet or folded towel as a buffer when placing heavy cookware on the floor. This is a small habit that makes a big difference over time.
Watch for Cooking Splatter
When you are frying or sautéing, oil and grease can splatter onto the floor. These residues are sticky and can attract dirt. A splatter screen helps contain most of the mess. If oil does hit the floor, wipe it up right away with a cloth dampened with a gentle cleaner.
Cooking in the kitchen can get hectic, especially when you are preparing meals for family. Whether you are making a fresh Greek Salad In A Jar for lunch or simmering a pot of Eggs In Purgatory for breakfast, kitchen messes are inevitable. The key is to stay on top of cleanup so that spills and splatters do not have time to damage your beautiful floors.
Control Humidity and Temperature
Wood is a natural material that responds to changes in moisture and temperature. In the kitchen, humidity levels can swing dramatically, especially during cooking. These changes cause wood to expand and contract, which leads to cracking, cupping, or gaps between planks over time.
Use a dehumidifier or humidifier to keep indoor humidity between 35 and 55 percent. This range is ideal for hardwood floors. In the summer, when humidity rises, a dehumidifier helps. In winter, when indoor air gets dry, a humidifier adds moisture back. Both tools are affordable and make a real difference.
Also, avoid placing your kitchen floor in direct sunlight for long periods. UV rays can fade and dry out wood over time. Use curtains or blinds to filter sunlight during the hottest parts of the day. This is an easy step that many people overlook.
When to Refinish Your Kitchen Floors
Even with the best care, your kitchen floors will eventually need professional refinishing. The question is when. Catching the right time saves you money and keeps your floors looking their best.
Signs that your floors need refinishing include:
- Visible scratches that go through the finish layer
- Water stains that do not come up with cleaning
- Dull or faded appearance despite regular maintenance
- Small gaps forming between planks
- Rough or uneven texture underfoot
Most kitchens need refinishing every 7 to 10 years, depending on foot traffic and how well you maintain them. The process involves sanding down the top layer and applying a fresh finish. It restores the wood’s natural beauty and adds a new layer of protective coating.
Do not wait too long between refinishing jobs. Once the wood itself starts to get damaged, repairs become more involved and costly. Staying ahead of the schedule keeps your floors in excellent condition for decades.
Quick Tips for Ongoing Kitchen Floor Care
Here is a quick checklist you can follow to keep your kitchen hardwood floors in top shape:
- Wipe up spills within minutes, not hours.
- Use felt pads on all furniture legs and replace them every 6 months.
- Sweep or vacuum daily to remove grit and debris.
- Place mats in the sink area, stove area, and kitchen entry.
- Clean with pH-neutral hardwood floor cleaner only.
- Keep indoor humidity between 35 and 55 percent.
- Schedule professional refinishing every 7 to 10 years.
- Use rugs or blankets under heavy appliances to distribute weight.
- Never use steam mops on hardwood floors.
- Remove shoes or wear clean slippers on the kitchen floor.
These tips are simple, but they work. The secret is consistency. You do not have to do everything at once. Start with the habits that feel easiest and build from there. Over time, these small actions add up to significant protection.
Common Mistakes People Make with Kitchen Hardwood Floors
Even well-meaning homeowners can accidentally damage their floors. Here are the most common mistakes to avoid:
Using too much water when mopping. Excess moisture seeps into the wood and causes swelling and warping. Always use a damp mop, never a wet one.
Ignoring small spills. A few drops of orange juice or coffee might seem harmless, but the acid in these liquids can etch the finish over time. Clean every spill, no matter how small.
Walking in with dirty shoes. Dirt and gravel act as abrasive particles that scratch the finish. Make it a house rule to remove shoes in the kitchen area.
Skipping protective mats. Some people think mats are just for aesthetics. In reality, they are functional tools that absorb moisture and reduce wear in high-traffic zones.
Using the wrong cleaner. Harsh chemicals strip the finish and leave the wood vulnerable. Always check that your cleaner is safe for hardwood before using it.
Avoiding these mistakes alone will dramatically extend the life of your kitchen hardwood floors. Combined with the protective strategies above, you set yourself up for years of beautiful, durable flooring.
Final Thoughts on Protecting Kitchen Hardwood Floors
Protecting your hardwood floors in kitchen spaces does not have to be complicated or expensive. The right combination of a quality finish, daily habits, protective mats, and humidity control keeps your floors looking stunning for years. Start with the basics — sealant, mats, and quick spill cleanup — and build from there.
Remember that prevention is always easier and cheaper than repair. A few minutes of care each day saves you from costly refinishing jobs down the road. Your kitchen hardwood floors are a valuable part of your home, and they deserve the best protection you can give them.
Take action today. Check your floor finish, place mats in the right spots, and make a habit of wiping up spills right away. Your future self will thank you when your kitchen floors still look gorgeous years from now.
Frequently Asked Questions
What is the best sealant for kitchen hardwood floors?
Water-based polyurethane is a top choice because it dries quickly, stays clear, and resists kitchen moisture well. Oil-based polyurethane offers a warmer look and slightly more durability. Hard wax oil is another excellent option for a natural feel with easy spot repairs. Choose based on your floor’s current finish and your lifestyle.
How often should I refinish my kitchen hardwood floors?
Most kitchens need refinishing every 7 to 10 years with regular use. High-traffic kitchens or homes with pets may need it more often. Watch for signs like visible scratches, water stains, or a dull appearance, and schedule refinishing when you notice them.
Can I use a steam mop on hardwood kitchen floors?
No. Steam mops introduce too much moisture into the wood, which can cause warping, buckling, and finish damage. Stick to a damp mop with a hardwood-safe cleaner. Always wring the mop out thoroughly before use.
What type of mat is best for protecting kitchen hardwood floors?
Look for natural rubber-backed, waterproof mats that are easy to clean. Place them near the sink, stove, and kitchen entry points. Avoid mats with thick rubber backing that trap moisture underneath, as this can cause the wood to swell.
How do I remove water stains from kitchen hardwood floors?
For fresh water stains, blot immediately and let the area dry completely. For set-in stains, lightly sand the spot and apply a matching wood filler and finish. Severe stains may require professional refinishing. Acting quickly is the best way to prevent permanent staining.
Does humidity really affect hardwood kitchen floors?
Yes, absolutely. Wood expands when humidity is high and contracts when it is low. This constant movement can cause cracking, gaps, and cupping over time. Keeping indoor humidity between 35 and 55 percent stabilizes the wood and prevents these issues.
=== CONCLUSION ===
Protecting hardwood floors in kitchen spaces is all about combining the right products with smart daily habits. A quality finish, protective mats, quick spill cleanup, and proper humidity control form the foundation of a solid floor care routine. These steps are simple, affordable, and incredibly effective.
Start today with the tips in this guide, and your kitchen floors will thank you for years to come. Consistent care now means beautiful floors later. Your kitchen deserves floors that look as good as the meals you cook on it.