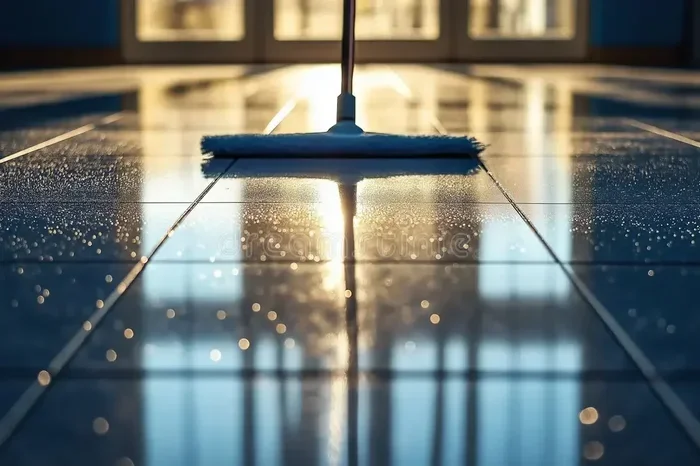
Learning how to deep clean kitchen floor is easier than you think. With the right supplies, a simple step-by-step method, and a little elbow grease, you can remove stubborn stains, kill hidden germs, and restore your floor to a spotless shine. This guide covers everything from essential tools to floor-type-specific care, so your kitchen stays fresh and hygienic all year round.
Your kitchen floor takes a beating every single day. Foot traffic, food spills, cooking grease, and tracked-in dirt all pile up faster than you might notice. While a quick sweep or a fast mop helps on the surface, it does not truly deep clean kitchen floor down to the bare surface. Over time, hidden grime, bacteria, and sticky residue build up in the cracks and corners, creating an unclean environment right under your feet.
If you have been wondering how to deep clean kitchen floor the right way, you have come to the right place. This guide walks you through every step with simple, practical advice. You will learn what supplies you need, the exact cleaning process, how to handle different floor types, and expert tips to keep your kitchen floor sparkling between deep cleans. No guesswork, no fluff, just real results.
Deep cleaning your kitchen floor is not just about looks. It is about kitchen hygiene and protecting your family’s health. Bacteria, mold spores, and allergens hide in the smallest crevices of your floor. A proper deep clean removes these hidden threats and leaves your space fresh, safe, and truly clean. Let us dive in.
Key Takeaways
- Regular deep cleaning prevents buildup: A thorough kitchen floor cleaning every few weeks keeps grime, grease, and bacteria from accumulating.
- The right supplies make all the difference: Using the correct floor cleaner, scrub brush, and mop ensures better results with less effort.
- Different floors need different care: Tile, hardwood, and laminate floors each require specific cleaning methods to avoid damage.
- Daily habits reduce the need for deep cleans: Quick sweeping and immediate spill cleanup go a long way in maintaining a spotless floor.
- Avoid common mistakes: Using too much water, harsh chemicals, or the wrong mop can harm your floors over time.
- Consistency beats intensity: A regular kitchen maintenance routine keeps floors cleaner longer and makes each deep clean faster.
📑 Table of Contents
Why Your Kitchen Floor Needs a Deep Clean
You might be thinking, “I mop my kitchen floor every week. Why do I need a deep clean?” That is a great question. Regular mopping handles surface dirt and light grime. But it does not remove the deep-down buildup that accumulates over days and weeks.
When you cook, tiny grease particles become airborne and settle on the floor. Foot traffic tracks in dirt and dust from outside. Juice spills, crumbs, and food bits get ground into the surface. Over time, this creates a filmy layer that makes your floor look dull, even right after you mop.
The Hidden Germs You Cannot See
Here is something that might surprise you. Studies show that kitchen floors can harbor more bacteria than you would expect. Think about all the raw food prep, dropped crumbs, and moisture that sits on your floor. Regular mopping might spread bacteria around rather than remove it. A proper deep cleaning session with the right cleaning solution actually kills germs and lifts them away from the surface.
Another reason to deep clean regularly is floor care. Dirt and grit act like sandpaper on your floor finish. The more it sits, the more damage it causes. Removing it regularly keeps your floor looking newer for longer and saves you money on repairs or replacement down the road.
What You Need Before You Start
Before you begin, gather everything you need. Having your cleaning supplies ready makes the process smooth and efficient. You do not want to stop halfway through to find a missing tool.
Essential Cleaning Supplies
- Broom or vacuum with a hard-floor attachment
- Mop and bucket (a microfiber mop works great)
- Floor cleaner suitable for your floor type
- Scrub brush or old toothbrush for tough spots
- White vinegar or baking soda for natural cleaning
- Dish soap for a homemade cleaning solution
- Clean rags or microfiber cloths
- Rubber gloves to protect your hands
- Stiff nylon brush for grout cleaning
Quick Tips: Must-Have Tools
A good mop technique starts with the right tool. Microfiber mops trap dirt better than traditional string mops. They also use less water, which is especially important for hardwood floor and laminate surfaces. If you have tile floors, a grout brush makes a huge difference in getting those lines truly clean.
For a natural cleaning solution, mix warm water with a few drops of dish soap and a half cup of white vinegar. This combination cuts through grease and leaves a fresh scent without harsh chemicals. It is one of the best deep cleaning tips for a spotless floor without spending a fortune on products.
Step-by-Step: How to Deep Clean Kitchen Floor
Now that you have your supplies ready, let us walk through the actual process. Follow these steps in order for the best results. This method works for most kitchen floors and can be adapted based on your specific surface.
Step 1: Clear the Floor
Start by removing everything from the floor. Pick up chairs, rugs, trash cans, and any other items. This gives you full access to every inch of the floor. As you move items, check underneath them. You will likely find a collection of dust and crumbs that have gathered there.
Next, sweep or vacuum the entire floor thoroughly. Use long, sweeping motions and pay extra attention to corners and edges where dirt likes to hide. A vacuum with a hard-floor setting is ideal because it pulls out fine dust that a broom might miss.
Step 2: Prepare Your Cleaning Solution
Fill your bucket with warm water and add your chosen floor cleaner. If you are using a store-bought product, follow the label instructions carefully. If you prefer a DIY approach, mix a few drops of dish soap with warm water and add the white vinegar.
Important note: Do not make the solution too soapy. Excess soap leaves a sticky residue on the floor, which attracts more dirt. A light, effective solution works better than a heavy, sudsy one.
Step 3: Scrub the Tough Spots First
Before you mop the whole floor, tackle any stubborn spots. Stains from food, grease marks, and sticky residue need extra attention. Dip your scrub brush into the cleaning solution and work it into the affected areas using small circular motions.
For grout cleaning on tile floors, use an old toothbrush dipped in baking soda paste. Scrub along the grout lines gently but firmly. This lifts discoloration without damaging the grout. Let the solution sit on tough stains for a few minutes before scrubbing for the best stain removal results.
Step 4: Mop the Entire Floor
Now it is time to mop. Dip your mop into the bucket, wring it out well, and start from the back corner of the kitchen. Work your way toward the door so you do not step on wet, dirty areas. Use smooth, overlapping strokes for even coverage.
Your mop technique matters here. Do not soak the floor. Excess water can seep into cracks and damage the flooring underneath, especially on hardwood floors and laminate. A lightly damp mop is all you need for a thorough clean.
Step 5: Rinse and Dry
After mopping with your cleaning solution, refill the bucket with clean warm water. Go over the floor again with just water to rinse away any remaining cleaner residue. This step is key for a truly spotless floor because leftover soap can leave a dull film.
Finally, dry the floor with a clean towel or let it air dry. Walking on a wet floor can leave footprints and reintroduce dirt. If you are in a hurry, a dry microfiber cloth works wonders for getting an instant floor shine.
Step 6: Put Everything Back
Once the floor is completely dry, replace your rugs, chairs, and any other items you moved. Take a moment to step back and admire your work. A freshly deep cleaned kitchen floor makes the entire room feel cleaner and more welcoming.
How to Deep Clean Different Kitchen Floor Types
Not all kitchen floors are the same, and each type needs specific care. Using the wrong method can damage your floor or leave it looking worse than before. Here is how to adapt your approach based on your floor material.
Tile Floors
Tile floors are durable and relatively easy to clean, but the grout lines need special attention. Use a grout brush and baking soda paste for deep grout cleaning. For the tile surface itself, a vinegar and water solution works well to cut through grease and grime. Avoid acidic cleaners on natural stone tiles like marble or granite, as they can etch the surface.
Hardwood Floors
Hardwood floors require extra care because they are sensitive to moisture. Never soak a hardwood floor with water. Use a barely damp mop and a cleaner specifically designed for hardwood. Avoid vinegar on hardwood floors with a polyurethane finish, as it can dull the shine over time. Dry the floor immediately after cleaning to prevent water damage.
Laminate Floors
Laminate floors look like hardwood but have a different structure. They are more resistant to moisture but still should not be flooded. Use a minimal amount of water and a gentle cleaning solution made for laminate. Wipe up any excess moisture quickly. A dry microfiber mop is an excellent tool for laminate surfaces because it picks up dirt without leaving moisture behind.
Comparison Table: Cleaning by Floor Type
| Floor Type | Best Cleaner | Water Amount | Special Tip |
|---|---|---|---|
| Tile | Vinegar and water or commercial tile cleaner | Moderate | Scrub grout lines with a brush |
| Hardwood | Wood-specific floor cleaner | Minimal | Dry immediately after cleaning |
| Laminate | Laminate-safe cleaner or mild dish soap | Minimal | Use a dry microfiber mop |
| Vinyl | Vinyl floor cleaner or mild soap | Moderate | Avoid abrasive scrub brushes |
| Concrete | Degreaser and stiff scrub brush | Moderate | Seal periodically for protection |
Tips to Keep Your Kitchen Floor Sparkling Between Deep Cleans
The secret to a always-clean kitchen floor is consistency. You do not need to deep clean every week, but building a few simple habits makes a world of difference.
Daily Habits That Help
- Sweep or vacuum daily to remove loose dirt and crumbs
- Clean up kitchen spills immediately before they stain or stick
- Place doormats at every entrance to catch outdoor dirt
- Wipe up grease splatters right after cooking
- Remove shoes before walking on the kitchen floor
Weekly Routines for Ongoing Kitchen Maintenance
Once a week, give your kitchen floor a quick but thorough cleaning. Mop with a mild cleaning solution and focus on high-traffic areas. This prevents buildup and means your monthly deep clean will be faster and easier each time.
Another great habit is to place a rug or mat in the cooking area. This catches falling food and grease before it reaches the floor, making your kitchen hygiene routine much simpler. Wash these rugs regularly to prevent them from becoming a source of grime themselves.
Common Mistakes to Avoid
Even with the best intentions, people often make mistakes that hurt their floors more than help them. Here are the most common ones to watch out for.
- Using too much water: This is the number one mistake for hardwood and laminate floors. Excess water seeps into seams and causes warping or swelling.
- Skipping the rinse: Mopping with dirty water just spreads grime around. Always rinse your floor after using a cleaning solution.
- Using the wrong cleaner: Harsh chemicals can damage floor finishes and strip away protective coatings. Always check that your floor cleaner is safe for your specific floor type.
- Ignoring the mop head: A dirty mop head just spreads dirt. Rinse your mop frequently during the cleaning process and replace it when it starts to fray.
- Neglecting corners and edges: Dirt builds up in places you do not see. Use a corner brush or an old toothbrush to keep these areas clean.
Expert Insights: What Professional Cleaners Do
Professional cleaners have a few tricks that make their work faster and more effective. One of the best deep cleaning tips they share is to clean from top to bottom. Wipe down counters and shelves before you mop the floor. This way, any dust or crumbs that fall during cleaning end up on the floor, where you will clean them up in one pass.
Another pro tip is to use hot water instead of lukewarm. Hot water dissolves grease and grime more effectively, meaning you need less cleaner and less scrubbing. It is a simple change that makes a noticeable difference in your cleaning routine.
Professionals also recommend replacing your mop head regularly. A worn-out mop does not pick up dirt effectively and can scratch floors. If you use a reusable mop, wash the head after every use and let it dry completely before storing it. This prevents mold and bacteria growth on the tool itself.
Final Thoughts
How to deep clean kitchen floor does not have to be a daunting chore. With the right supplies, a clear plan, and a little bit of effort, you can transform a dull, dirty floor into a spotless floor that looks and feels brand new. The key is consistency and using the correct method for your specific floor type.
Remember, a clean kitchen floor is about more than just appearance. It is about kitchen hygiene, protecting your investment, and creating a healthier home for your family. Start with the steps outlined in this guide, build a simple maintenance routine, and you will see the difference every time you walk into your kitchen.
Deep cleaning your kitchen floor is one of the most impactful things you can do for your home. It takes less time than you think, and the results are immediate and satisfying. So grab your mop, gather your supplies, and give your kitchen floor the deep clean it deserves. Your spotless, sparkling floor is just one session away.
Frequently Asked Questions
How often should I deep clean my kitchen floor?
Most homes benefit from a deep clean every two to four weeks. If you cook frequently or have pets, you may need to do it more often. Regular sweeping and mopping between deep cleans helps reduce the buildup and keeps the process quick.
What is the best homemade cleaning solution for kitchen floors?
A simple and effective solution is warm water mixed with a few drops of dish soap and half a cup of white vinegar. This combination cuts through grease, removes light stains, and leaves a fresh scent. Always test on a small, hidden area first, especially on hardwood or laminate floors.
Can I use a steam mop to deep clean my kitchen floor?
Yes, steam mops are excellent for sanitizing and deep cleaning many floor types. However, they are not suitable for all surfaces. Avoid steam mops on hardwood floors with a wax finish or unsealed wood, as the heat and moisture can cause damage. Check your manufacturer’s guidelines before using one.
How do I remove tough grease stains from my kitchen floor?
Make a paste using baking soda and a small amount of water. Apply it directly to the grease stain and let it sit for 10 to 15 minutes. Scrub gently with a scrub brush or old toothbrush, then wipe clean with a damp cloth. For stubborn stains, repeat the process or use a commercial degreaser.
Should I mop before or after cleaning the kitchen counters?
Always mop after cleaning counters and shelves. When you wipe down higher surfaces, dust and crumbs fall to the floor. Mopping last ensures you pick up everything in one pass. This top-to-bottom approach is one of the best deep cleaning tips professionals follow.
Is it safe to use vinegar on all kitchen floor types?
Vinegar is a great natural cleaner for tile and laminate floors, but it is not safe for all surfaces. Avoid vinegar on marble, granite, and hardwood floors with a wax or polyurethane finish, as the acidity can damage the protective layer. When in doubt, use a cleaner specifically formulated for your floor type.
=== CONCLUSION ===
Learning how to deep clean kitchen floor is a valuable skill that pays off every single day. A clean kitchen floor improves your home’s appearance, supports better kitchen hygiene, and extends the life of your flooring. By following the steps in this guide, using the right cleaning supplies, and building a simple maintenance routine, you can enjoy a spotless floor without spending hours on the task.
Start today. Pick one section from this guide, gather your supplies, and give your kitchen floor the care it deserves. You will be amazed at the difference a proper deep clean makes. Keep your floors shining, your kitchen fresh, and your home healthy with these simple, effective cleaning practices.