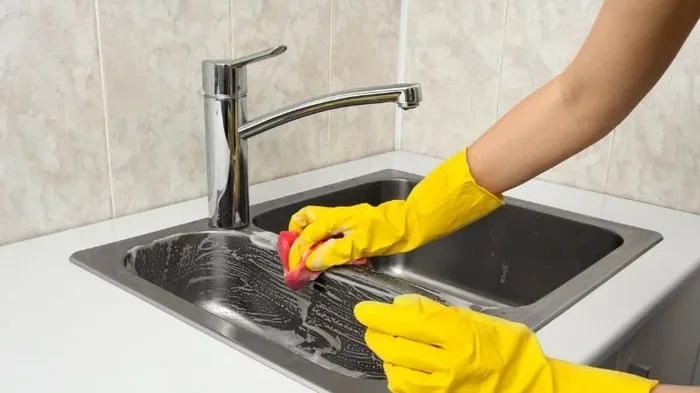
Discover how to disinfect kitchen sink surfaces fast using simple, natural ingredients like vinegar, baking soda, and hydrogen peroxide. This guide covers everything from daily cleaning routines to deep sanitizing methods that kill bacteria without harsh chemicals. You will learn practical steps, expert tips, and common mistakes to keep your kitchen sink cleaner and your family safer.
Your kitchen sink handles a lot every single day. It washes dishes, rinses fruits, and gets splashed with raw meat juices. Yet most people do not give it a proper disinfecting until something smells wrong. The truth is, a dirty sink is a breeding ground for harmful germs that can affect your entire household.
In this guide, you will learn exactly how to disinfect kitchen sink areas quickly and naturally. No harsh chemicals. No expensive products. Just simple, proven methods that actually work. Whether you deal with hard water stains, lingering odors, or just want better kitchen hygiene, this article has you covered.
We will walk through the why, the what, and the how. By the end, you will have a clear routine that keeps your sink sparkling and germ-free every single day.
Key Takeaways
- Natural disinfectants work great: Vinegar, baking soda, and hydrogen peroxide are safe, effective alternatives to bleach.
- Daily habits prevent buildup: A quick rinse and wipe after each use keeps sink bacteria from multiplying.
- Step-by-step methods save time: The right technique makes disinfecting your sink fast and effortless.
- Avoid common mistakes: Skipping the drain, using abrasive scrubbers, and ignoring the faucet can spread germs.
- Regular maintenance extends cleanliness: Weekly deep cleans keep your kitchen hygiene at its best.
- Eco-friendly options are powerful: You do not need toxic chemicals to achieve a truly sanitized kitchen sink.
📑 Table of Contents
- Why Your Kitchen Sink Needs Regular Disinfection
- Natural Ingredients That Kill Sink Bacteria
- Step-by-Step Guide to Disinfecting Your Kitchen Sink
- How to Remove Stains and Odors from the Sink
- Common Mistakes to Avoid When Cleaning Your Sink
- Keeping Your Kitchen Sink Germ-Free Every Day
- Comparison: Natural vs. Chemical Sink Cleaners
- Expert Insights on Kitchen Sink Hygiene
- Final Thoughts
Why Your Kitchen Sink Needs Regular Disinfection
Many people think a quick rinse with soap is enough. It is not. Your kitchen sink is one of the germiest spots in your entire home. Studies have shown that sink surfaces harbor more bacteria than a toilet seat after flushing.
The Hidden Danger of Sink Bacteria
Food particles, grease, and moisture create the perfect environment for germs to grow. Common bacteria found in sinks include E. coli, Salmonella, and Listeria. These can cause serious stomach issues and foodborne illnesses. Sanitizing your sink regularly breaks this cycle and protects your family’s health.
Raw meat juices, unwashed vegetables, and dirty sponges all contribute to the problem. Every time you rinse something in the sink, microscopic germs get left behind. Over time, these build up and spread to your hands, dishes, and even food prep surfaces.
How Often Should You Disinfect?
You should do a quick wipe-down of your sink at least once a day. A deeper disinfection routine should happen two to three times per week. If you prepare raw meat frequently, you need to clean the sink immediately after each use.
Pay extra attention to the drain, the faucet handles, and the edges where the sink meets the countertop. These are often overlooked spots where germs love to hide. A consistent daily sink cleaning habit makes the whole process much easier over time.
Natural Ingredients That Kill Sink Bacteria
You do not need toxic bleach or expensive commercial sprays to get a germ-free sink. Nature provides powerful natural disinfectants that are safe, affordable, and incredibly effective. Here are the best ingredients to use.
White Vinegar: A Powerful Acid Cleaner
White vinegar is a natural acid that kills many types of bacteria and mold. It cuts through grease, removes hard water deposits, and eliminates odors. When you disinfect sink surfaces with vinegar, you are using a time-tested cleaning method that has been around for centuries.
Look for distilled white vinegar with at least 5% acidity for the best results. It is safe for most sink materials, including stainless steel, porcelain, and composite granite. The sharp smell fades quickly once it dries.
Baking Soda: The Gentle Scrubbing Hero
Baking soda is a mild abrasive that lifts stains and absorbs odors without scratching surfaces. It works wonders on kitchen sink stains caused by coffee, tea, and food coloring. When paired with vinegar, it creates a fizzing reaction that helps lift dirt and grime from surfaces.
You can also use baking soda as a paste with a few drops of water. Apply it to stubborn spots, let it sit for ten minutes, and scrub gently. This simple trick makes cleaning the sink much easier and more effective.
Hydrogen Peroxide: The Germ Killer
Hydrogen peroxide is a natural bleaching agent and disinfectant. It kills bacteria, viruses, and fungi on contact. A 3% solution, which is what you find at any drugstore, is safe for home use and breaks down into water and oxygen after it does its job.
Use it as a spray after your vinegar and baking soda treatment. It adds an extra layer of germ removal without leaving harmful residues. Just spray, let it sit for a minute, and rinse thoroughly.
Lemon Juice: Fresh Scent and Extra Cleaning Power
Lemon juice adds a pleasant scent and boosts the cleaning power of your solutions. The citric acid in lemons helps dissolve mineral deposits and soap scum. It also acts as a natural eco-friendly sink cleaner that is gentle on the environment.
Rub a lemon half directly on stainless steel sinks for a natural shine. You can also add lemon juice to your vinegar spray for a refreshing homemade sink cleaner that smells amazing.
Step-by-Step Guide to Disinfecting Your Kitchen Sink
Now that you know the best natural ingredients, let us walk through the actual process. Follow these steps for a thoroughly disinfected kitchen sink that looks and smells fantastic.
Step 1: Remove All Items and Debris
Start by taking out the dish rack, strainer, and any other items from the sink. Remove visible food particles and rinse away loose debris. This gives you full access to every surface you need to clean.
Use a dry cloth to wipe away crumbs and larger bits of food. Do not skip the drain stopper and the edges around the faucet. These areas collect buildup that you cannot see but that harbor plenty of sink bacteria.
Step 2: Apply Baking Soda Paste
Make a thick paste by mixing three tablespoons of baking soda with one tablespoon of water. Spread it evenly across the entire sink surface, including the basin, the sides, and the drain opening. Let it sit for at least ten minutes to loosen grime and absorb odors.
For particularly stained sinks, you can let the paste sit for up to thirty minutes. This gives the baking soda sink treatment more time to work its magic on tough stains and buildup.
Step 3: Spray with Vinegar Solution
Fill a spray bottle with equal parts white vinegar and water. Spray the entire surface generously over the baking soda paste. You will see a fizzing reaction, which is exactly what you want. This reaction helps lift dirt, grease, and bacteria from the surface.
Let the mixture sit for five to ten minutes. Do not rinse it off yet. This dwell time is essential for the vinegar to break down grime and kill surface-level germs. This is one of the most effective disinfect sink techniques you can use at home.
Step 4: Scrub Thoroughly
Use a soft sponge or a non-abrasive scrub brush to clean every surface. Work in circular motions, paying special attention to corners, edges, and the drain area. For the faucet and handles, use a damp cloth dipped in the vinegar solution.
Do not use steel wool or harsh scrubbers. These can scratch stainless steel and create tiny grooves where bacteria can hide. A soft microfiber cloth or a silicone scrubber works perfectly for gentle but effective cleaning.
Step 5: Rinse and Apply Hydrogen Peroxide
Rinse the entire sink with warm water, making sure to wash away all baking soda and vinegar residue. Then spray a light mist of 3% hydrogen peroxide over the wet sink surfaces. Let it sit for one minute before rinsing again.
This final step ensures maximum germ removal and adds a light bleaching effect that helps remove any remaining stains. It is the finishing touch that takes your kitchen sink cleaner routine from good to great.
Step 6: Dry and Polish
Use a clean, dry microfiber cloth to wipe the entire sink dry. This prevents water spots and hard water deposits from forming. For stainless steel sinks, polish in the direction of the grain for a streak-free shine.
Drying the sink also removes moisture that bacteria need to survive. This simple step significantly extends the time between deep cleans and keeps your kitchen hygiene at a high level. Make this the final step in every disinfection routine.
How to Remove Stains and Odors from the Sink
Even with regular cleaning, sinks can develop stubborn stains and unpleasant odors. Here is how to tackle the most common problems using natural methods.
Dealing with Hard Water Stains
Hard water leaves white chalky deposits that can make your sink look dirty even after cleaning. Soak a cloth in undiluted white vinegar and lay it over the stained areas. Leave it for thirty minutes, then scrub gently with a soft brush.
For heavy buildup, make a paste of baking soda and vinegar, apply it to the stains, and let it sit for an hour. The acid in the vinegar dissolves mineral deposits naturally. This is one of the best eco-friendly sink cleaner methods for hard water issues.
Eliminating Lingering Odors
Foul smells usually come from food particles trapped in the drain or from a dirty drain stopper. Pour half a cup of baking soda down the drain, followed by half a cup of vinegar. Let it fizz for fifteen minutes, then flush with boiling water.
For persistent odors, drop a few lemon slices into the drain and run warm water. This leaves a fresh, natural scent and helps clean the sink from the inside out. Regular use of this method prevents odors from returning.
Removing Coffee and Tea Stains
Dark stains from coffee and tea are common in white and light-colored sinks. Make a thick paste of baking soda and a few drops of lemon juice. Apply it directly to the stains and let it sit for twenty minutes before scrubbing.
The combination of the mild abrasive and the natural bleaching properties of lemon works wonders. Repeat if necessary for deeply set stains. This approach is much safer than using harsh chemical stain removers in your kitchen sink maintenance routine.
Common Mistakes to Avoid When Cleaning Your Sink
Even with the best intentions, people make mistakes that reduce the effectiveness of their cleaning efforts. Here are the most common errors and how to avoid them.
Using Abrasive Cleaners on Delicate Surfaces
Many people reach for scouring pads and harsh powders that scratch sink surfaces. Scratches create tiny crevices where bacteria can hide and multiply. Always use soft sponges or microfiber cloths for gentle but effective cleaning.
Read the care instructions for your specific sink material. Marble and granite sinks are especially sensitive to acidic cleaners like vinegar. In those cases, use a pH-neutral natural disinfectant instead.
Skipping the Faucet and Handles
The faucet and handles are high-touch surfaces that collect germs from raw food, dirty hands, and splashes. If you only clean the basin, you are missing a major source of sink bacteria. Wipe down the entire faucet, handles, and spout every time you clean.
Use the same vinegar solution for these areas. For brass or gold-finished faucets, use a milder solution to avoid tarnishing. Regular attention to these spots is an essential part of daily sink cleaning.
Ignoring the Drain and Stopper
The drain and stopper trap food particles, grease, and hair that cause odors and bacterial growth. Remove the stopper regularly and clean it separately. Use a small brush to scrub inside the drain opening where buildup accumulates.
A monthly deep clean of the drain with baking soda and vinegar keeps things flowing smoothly and smelling fresh. This is often overlooked in kitchen sink maintenance but makes a huge difference in overall kitchen hygiene.
Using Too Much Bleach
While bleach is effective, it is harsh, releases toxic fumes, and can damage sink surfaces over time. It also leaves chemical residues that can contaminate dishes and food preparation areas. Natural alternatives like vinegar and hydrogen peroxide are safer and just as effective for most situations.
If you must use bleach, dilute it properly and rinse thoroughly. But for everyday disinfecting your sink needs, the natural methods in this guide work better and are safer for your family. This is the core message behind choosing a clean sink naturally approach.
Keeping Your Kitchen Sink Germ-Free Every Day
A deep clean is important, but daily habits are what truly keep your sink sanitary. Building a few simple routines takes just minutes and pays off big time in germ removal and overall cleanliness.
Rinse After Every Use
Get in the habit of rinsing the sink with hot water after washing dishes or preparing food. This removes food particles and prevents them from sticking to surfaces. A quick rinse takes only ten seconds and dramatically reduces sink bacteria buildup.
After rinsing, shake out the sponge and leave it in a dry area. Wet sponges are breeding grounds for bacteria that transfer right back to your clean sink. Consider microwaving a damp sponge for one minute to kill germs regularly.
Wipe Down the Faucet Daily
Give the faucet and handles a quick wipe with a damp cloth each morning. This removes water spots, toothpaste splatter, and any germs from touching raw food. It is one of the easiest kitchen hygiene habits you can build.
Keep a small microfiber cloth near the sink dedicated to this purpose. Replace it every few days for the best results. This simple habit is a cornerstone of effective kitchen sink maintenance.
Deep Clean Weekly
Set a reminder to do the full step-by-step disinfection process at least once a week. This prevents buildup from becoming a major problem. A weekly routine takes about fifteen minutes and keeps your sink in excellent condition.
Mark it on your calendar or set a phone reminder. Consistency is the key to maintaining a sanitized kitchen sink without spending a lot of time or money. Once it becomes a habit, it feels completely natural.
Replace Your Sponge Regularly
Your kitchen sponge is one of the germiest items in your home. Replace it every two weeks, or more often if it starts to smell. A clean sponge means a cleaner sink and better overall kitchen hygiene.
You can also sanitize sponges by soaking them in a vinegar and water solution for ten minutes. This simple step extends their life while keeping them hygienic. It is a small change that makes a big difference in your daily sink cleaning efforts.
Comparison: Natural vs. Chemical Sink Cleaners
Many people wonder whether natural cleaners really work as well as chemical-based products. Here is a straightforward comparison to help you decide what is best for your kitchen sink cleaner routine.
- Effectiveness: Vinegar and baking soda remove most everyday grime effectively. Chemical cleaners may work faster on extremely tough stains, but natural methods handle 90% of household needs well.
- Safety: Natural ingredients are non-toxic and safe around children and pets. Chemical cleaners contain fumes that can irritate lungs and eyes, especially in poorly ventilated kitchens.
- Cost: Vinegar, baking soda, and hydrogen peroxide cost pennies per use. Commercial cleaners can add up to significant annual expenses over time.
- Environmental Impact: Natural cleaners break down safely and do not contribute to water pollution. Chemical products often contain substances harmful to aquatic ecosystems.
- Surface Safety: Natural methods are gentle on all sink materials. Harsh chemicals can damage grout, sealants, and certain finishes over repeated use.
For most households, a combination of white vinegar, baking soda, and hydrogen peroxide provides everything you need for a truly disinfected kitchen sink. Save chemical cleaners for rare, heavy-duty situations only.
Expert Insights on Kitchen Sink Hygiene
Professional cleaners and microbiologists agree that consistency matters more than intensity when it comes to kitchen sink disinfection. A light daily clean beats a deep monthly scrub every time. The goal is to never let bacteria colonies establish themselves in the first place.
Experts also recommend paying attention to what touches your sink. Your sponge, dishcloth, and even the items you place in the sink can introduce new bacteria. Keeping these items clean is just as important as cleaning the sink itself. A holistic approach to kitchen hygiene gives the best long-term results.
Dr. Lisa Ackerley, a leading hygiene expert, emphasizes that food preparation areas should be cleaned and disinfected between tasks. Your sink is no exception. A quick clean sink naturally routine between preparing different foods prevents cross-contamination and keeps your family safe.
Final Thoughts
Learning how to disinfect kitchen sink areas naturally is one of the simplest yet most impactful things you can do for your home. It protects your family from harmful bacteria, keeps your kitchen smelling fresh, and saves money on expensive cleaning products. The methods in this guide are easy, effective, and safe for everyone.
Start with the basics: a daily rinse, a weekly deep clean using vinegar and baking soda, and consistent attention to the faucet, drain, and sponge. These small habits add up to a dramatically cleaner and healthier kitchen environment.
Remember, a disinfected kitchen sink is not about perfection. It is about building routines that work with your lifestyle. Pick the methods that fit your schedule and stick with them. Your sink and your family will thank you for it.
Now that you have all the tools and knowledge, it is time to put them into action. Grab some vinegar, grab some baking soda, and give your sink the care it deserves. You will be amazed at how quickly and easily a truly clean, germ-free sink is within reach.
Frequently Asked Questions
What is the best natural way to disinfect a kitchen sink?
The best natural method is to use a combination of baking soda, white vinegar, and hydrogen peroxide. Apply a baking soda paste first, spray with vinegar, scrub, then finish with hydrogen peroxide for maximum germ removal and stain lifting power.
How often should I disinfect my kitchen sink?
You should do a quick daily wipe-down and a thorough deep disinfection at least two to three times per week. If you handle raw meat frequently, clean the sink immediately after each use to prevent sink bacteria from spreading.
Can I use vinegar on all sink types?
Vinegar is safe for stainless steel, porcelain, and composite granite sinks. However, avoid using vinegar on natural stone like marble or granite, as the acid can damage the sealant. For those surfaces, use a pH-neutral natural disinfectant instead.
How do I remove black stains from my kitchen sink drain?
Black stains are usually caused by mold or mineral buildup. Pour baking soda and vinegar down the drain, let it fizz for fifteen minutes, then flush with boiling water. For stubborn stains, use a small brush to scrub inside the drain opening with the same solution.
Is hydrogen peroxide safe to use in kitchen sinks?
Yes, a 3% hydrogen peroxide solution is safe and effective for kitchen sink disinfection. It breaks down into water and oxygen after use, leaving no harmful residues. Just spray, let it sit for one minute, and rinse thoroughly.
How do I keep my sink smelling fresh between deep cleans?
Rinse the sink with hot water after each use and dry it with a clean cloth. Drop lemon slices into the drain weekly and run warm water. These simple habits prevent odors and support ongoing kitchen hygiene without extra effort.
=== CONCLUSION ===
Keeping your kitchen sink disinfected does not have to be complicated or chemical-heavy. With simple natural ingredients like white vinegar, baking soda, and hydrogen peroxide, you can achieve a truly sanitized kitchen sink in minutes. The step-by-step methods in this guide make it easy to build a routine that fits your lifestyle.
Remember to clean daily, deep clean weekly, and avoid common mistakes like skipping the faucet or using harsh abrasives. These small changes lead to a big difference in your home’s overall kitchen hygiene and your family’s health.
Start today. Pick one method from this guide and try it right now. A clean, fresh, germ-free sink is closer than you think. Your kitchen sink cleaner routine just got a whole lot simpler and more effective.