Staging your kitchen is one of the fastest ways to increase home value and attract buyers. This guide covers practical kitchen staging tips, from decluttering and lighting to styling counters with fresh produce like a Greek Salad in a Jar or serving Frozen Watermelon on a Stick for a pop of color. You will learn how to stage a kitchen on any budget and make your space feel larger, warmer, and more inviting.
Selling a home? The kitchen is the room that sells it. Buyers walk in, they glance at the stove, the counters, the fridge, and they decide if this house feels right. Staging a kitchen is not about fancy renovations. It is about making the space look clean, bright, and ready for the next family to cook their first meal in.
Whether you are preparing for an open house or just want your home to feel its best, how to stage a kitchen is a skill worth mastering. This guide walks you through every step. We cover decluttering, lighting, counter styling, color choices, and budget-friendly upgrades. You will also find quick tips, common mistakes to avoid, and real examples you can use today.
The goal is simple. Make your kitchen look amazing without spending a fortune. Let us get started.
Key Takeaways
- Declutter first: Remove personal items and excess furniture to create a clean canvas.
- Upgrade lighting: Bright, warm lighting makes a kitchen feel welcoming and spacious.
- Style your counters: Use fresh fruit, bowls, and simple decor to add life without clutter.
- Focus on the focal point: The backsplash, sink area, or island should draw the eye.
- Stage on a budget: Small changes like new handles and a fresh coat of paint deliver big results.
- Add food styling touches: A styled fruit bowl or a Greek Salad in a Jar makes the kitchen feel lived-in and inviting.
📑 Table of Contents
Why Kitchen Staging Matters for Home Value
Real estate data shows that the kitchen often drives a buyer’s decision. A well-staged kitchen can raise the perceived value of a home by thousands of dollars. Buyers form opinions within seconds of walking into a room. If the kitchen looks messy or outdated, they start counting the flaws.
But when the kitchen looks fresh and inviting, something shifts. Buyers start imagining Sunday morning pancakes, family dinners, and holiday baking. That emotional connection is powerful. Home staging taps into that feeling and turns a room from just a space into a dream.
Here is why staging your kitchen should be a top priority:
- First impressions count. The kitchen is one of the first rooms buyers check.
- It boosts perceived value. A clean, styled kitchen makes the whole home feel better.
- It photographs well. Online listings with great kitchen photos get more clicks.
- It justifies your price. A staged home often sells closer to the asking price.
- It speeds up the sale. Homes that sell faster save money on holding costs.
You do not need a full kitchen renovation to get these results. Kitchen staging tips focus on small, high-impact changes that anyone can do in a weekend.
Step-by-Step Guide on How to Stage a Kitchen
Staging a kitchen does not need to be overwhelming. Break it down into simple steps and tackle one area at a time. Here is a clear roadmap to follow.
Step 1: Declutter Everything
The first rule of staging is to remove anything that does not belong. Clear the counters. Pack away the cookbooks, the mail pile, the random mugs. You want every surface to look clean and open.
Start with the counters. Remove the toaster, the blender, and the fruit bowl if it is overflowing. Put personal items like family photos and prescription bottles out of sight. The goal is a blank slate. Buyers need to see the space, not your life.
Open every cabinet and drawer. Get rid of duplicates, broken items, and anything you have not used in months. A cluttered cabinet suggests a cluttered life. A clean cabinet suggests order and care.
Step 2: Deep Clean the Entire Space
After decluttering, deep clean. Scrub the stovetop. Wipe down the cabinets. Shine the faucet. Clean inside the microwave and the oven. Do not forget the fridge exterior and the handles of all drawers.
A sparkling kitchen signals that the home has been well cared for. It also makes every other staging effort look better. Dirt and grime undercut even the best styling choices.
Pay special attention to the grout between tiles and the edges of the backsplash. These small details matter more than most people think. A clean, fresh-smelling kitchen creates an instant positive impression.
Step 3: Style the Counters with Purpose
Once the counters are clean, it is time to style them. But less is more. Choose one or two focal items and keep the rest minimal.
A simple fruit bowl with a few bright pieces of fruit works wonders. Apples, oranges, or lemons add a pop of color and a fresh scent. You can also place a small vase with fresh flowers or a single potted herb plant. These touches make the kitchen feel alive.
For a fun and unexpected twist, try creating a Greek Salad in a Jar and set it on the counter. The jar looks charming, adds color, and gives buyers a sense of how enjoyable cooking and eating at home can be. A Frozen Watermelon on a Stick display can also add a playful, summery vibe that feels refreshing and unique.
The key is to keep the styling simple and intentional. Do not overcrowd the counters. Every item should earn its place.
Step 4: Upgrade the Lighting
Lighting is one of the most powerful staging tools. A well-lit kitchen feels bigger, cleaner, and more welcoming. Start by turning on all the lights in the room.
If your current bulbs are dim or yellow, swap them for bright white LED bulbs. Aim for a color temperature around 3000K to 4000K. This range feels warm and natural without being harsh.
Next, check if you have under-cabinet lighting. Many kitchens lack light in the prep areas. A simple LED strip under the cabinets can transform the space. It highlights the counters and makes the room feel more professional.
If you have a pendant light over the island or dining area, make sure it is clean and the bulb is visible. A statement pendant light can become a focal point and add style to an otherwise plain kitchen.
Step 5: Refresh the Walls and Backsplash
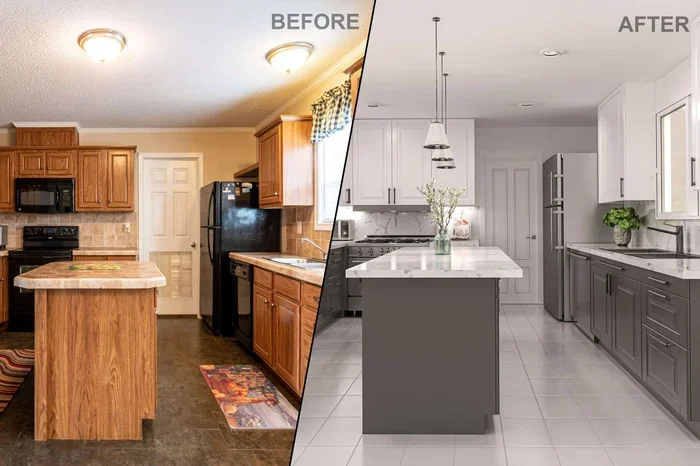
The walls and backsplash set the tone for the entire room. If your paint is chipped or the color feels dated, consider a fresh coat. Neutral tones like soft white, warm beige, or light gray work best for staging.
You do not need to paint every wall. A feature wall behind the stove or the sink can add interest without overwhelming the space. The backsplash area is another opportunity to add a subtle upgrade.
If replacing the backsplash is not in the budget, try cleaning the existing one thoroughly. Grout that looks fresh can make old tile feel new again. You can also add a thin, modern backsplash liner behind the stove for a quick, inexpensive refresh.
Step 6: Arrange the Furniture and Appliances
How you place the kitchen table, chairs, and appliances matters. Pull the table slightly away from the wall to create a sense of flow. Make sure chairs are neatly arranged and match in style.
Large appliances like the fridge and dishwasher should be closed and clean. If the stainless steel is showing fingerprints, wipe it down one more time. A neat appliance area makes the kitchen look maintained and ready for move-in.
If space allows, pull the kitchen island slightly away from the wall. This creates depth and makes the room feel larger. Add a few styled bar stools in matching colors for a polished look.
Kitchen Staging on a Budget
You do not need a big budget to stage a kitchen effectively. Some of the best staging moves cost almost nothing. Here are budget-friendly ideas that deliver high impact.
| Staging Move | Estimated Cost | Impact Level |
|---|---|---|
| Declutter and organize | $0 | Very High |
| Deep clean | $0-$20 | Very High |
| Swap cabinet handles | $20-$50 | High |
| Fresh coat of neutral paint | $50-$150 | Very High |
| Add fresh flowers or fruit | $10-$30 | High |
| Replace light bulbs with LEDs | $10-$25 | High |
| Style open shelves | $0 | Medium-High |
| Add a new backsplash liner | $30-$60 | Medium-High |
As you can see, many of the most effective staging moves are free or very affordable. The secret is to focus on what buyers see first. Clean surfaces, bright lighting, and a sense of order go a long way.
One of the best staging tips is to borrow ideas from home décor blogs and Pinterest boards. You do not need to spend big. You just need to think like a designer and arrange items with intention.
Common Kitchen Staging Mistakes to Avoid
Even with the best intentions, some staging mistakes can hurt your home’s appeal. Here are the most common ones and how to avoid them.
Mistake 1: Over-Styling the Counters
It is tempting to add lots of decorative items to make the kitchen look furnished. But too many items create clutter. Keep counters clear except for one or two intentional pieces. A single fruit bowl or a small potted plant is enough.
Mistake 2: Ignoring the Pantry and Cupboards
Buyers will open the cabinets. They will peek inside the pantry. If these spaces are messy or half-empty, it raises questions. Organize everything before staging. Remove expired items and group like items together neatly.
Mistake 3: Using Strong Scents
A scented candle or air freshener might seem like a good idea. But strong smells can be off-putting to some buyers. Instead, let the kitchen smell clean and neutral. Opening a window for fresh air works wonders.
Mistake 4: Forgetting the Floors
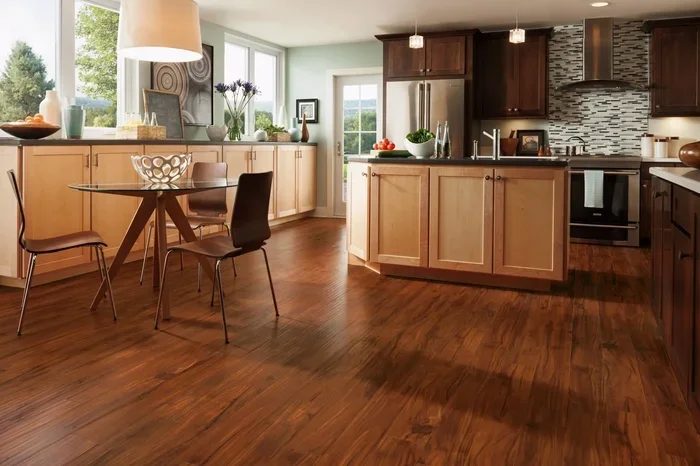
The kitchen floor gets a lot of attention. Sweep and mop thoroughly. If the flooring is worn or stained, consider renting a carpet cleaner or investing in a cheap area rug that covers the main walking path.
Mistake 5: Leaving Personal Items Behind
Family photos, kids’ drawings on the fridge, and personalized mugs make a kitchen feel like yours. But buyers need to see themselves in the space. Pack these items away and let the kitchen feel universal.
Expert Insights on Staging for a Quick Sale
Professional stagers know that the kitchen is the heart of the home. Here are a few expert insights that can elevate your staging game.
Focus on the sink area. The sink is one of the first things buyers notice. Make sure it is spotless. A clean faucet and a shiny basin send a strong message about maintenance.
Use mirrors and reflective surfaces. A small mirror or glossy backsplash can bounce light around the room and make it feel larger. This trick works especially well in smaller kitchens.
Create a staging vignette. A vignette is a small, styled scene that tells a story. Set the table with a simple placemat, a vase of fresh herbs, and a coffee cup. This helps buyers imagine themselves cooking and dining in the space.
Stage the kitchen for the season. In summer, lean into bright, fresh colors with citrus fruits and light linens. In winter, use warm tones like cinnamon sticks in a bowl or a soft plaid towel. Seasonal staging makes the home feel current and cared for.
Always stage from the buyer’s perspective. Walk into the kitchen and pretend you are seeing it for the first time. What stands out? What feels missing? Fix those things first.
How to Stage a Kitchen for Different Home Styles
Every kitchen is different, and staging should reflect the home’s style. Here are quick tips for common kitchen types.
Modern kitchens. Keep lines clean and minimal. Use monochrome tones, geometric shapes, and one statement piece like a bold pendant light. Avoid clutter at all costs.
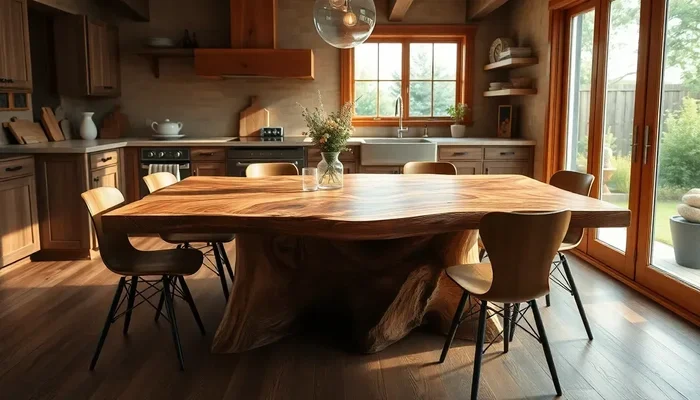
Farmhouse kitchens. Warmth is key. Use natural wood accents, woven baskets, and mason jars with fresh flowers. A rustic wooden cutting board on the counter adds charm.
Small kitchens. Maximize the sense of space. Use wall-mounted shelves to free up counter space. Stick to light colors on walls and cabinets. A single large mirror can make the room feel twice as big.
Luxury kitchens. Highlight high-end features. Style the island with designer barware. Add a fresh floral arrangement and premium-looking dishware. The goal is to showcase the quality of the space.
No matter the style, the core principles remain the same. Declutter, clean, light, and style with intention. Staging a home kitchen follows the same rules whether the home is a cozy cottage or a sprawling estate.
Key Takeaways
- Start with decluttering: Clear every surface and remove personal items to create a blank canvas.
- Deep clean everything: A spotless kitchen builds trust and makes every other effort count.
- Style counters simply: Use fresh fruit, a single vase, or a styled jar to add charm without clutter.
- Upgrade lighting: Bright, warm bulbs and under-cabinet strips transform the room’s feel.
- Refresh walls and backsplash: A neutral paint job or clean grout makes a big difference on a small budget.
- Avoid common mistakes: Over-styling, strong scents, and personal items can hurt your sale.
- Think like a buyer: Stage from their perspective and let the kitchen tell a story of comfort and possibility.
Conclusion
How to stage a kitchen comes down to a few simple principles. Declutter, clean, style, and light. These steps work whether you are selling your home or just want your kitchen to feel its best. The goal is to create a space that feels inviting, spacious, and ready for the next chapter.
You do not need a massive budget or a full renovation. Small, thoughtful changes deliver the biggest results. A fresh fruit bowl, a new set of cabinet handles, and a deep clean can transform a kitchen in just a few hours.
Remember the little details too. Style your counters with care. Add a pop of color with fresh produce or a seasonal touch. Make the lighting warm and welcoming. These small efforts add up to a big impact on how buyers see your home.
So go ahead. Open those cabinets, wipe down those counters, and let your kitchen shine. A well-staged kitchen does not just boost home value. It makes you proud to show your home to anyone who walks through the door.
Frequently Asked Questions
What is the easiest way to stage a kitchen for sale?
Start by decluttering every surface and deep cleaning the entire space. Remove personal items, add fresh fruit or a small flower arrangement, and swap old light bulbs for bright white LEDs. These simple steps take just a few hours and make a dramatic difference.
How much does it cost to stage a kitchen?
You can stage a kitchen for as little as $20 to $50 if you focus on free and low-cost moves like decluttering, cleaning, and adding fresh produce. Larger investments like new paint or cabinet hardware can bring the total to $150 or more, but even small changes deliver high impact.
What colors make a kitchen look bigger when staging?
Light, neutral tones work best. Soft white, warm beige, light gray, and pale blue make walls feel open and airy. Avoid dark or bold colors in small kitchens, as they can make the space feel cramped and closed in.
Should I stage my kitchen even if it is not for sale?
Absolutely. Staging your kitchen can make your home feel more organized, welcoming, and enjoyable to live in. Even if you are not selling, these tips help you create a space that looks and feels its best every day.
How long does kitchen staging take?
A basic staging session takes about 2 to 4 hours for most kitchens. Deep cleaning and decluttering may take longer, but the styling portion is quick. Many homeowners complete a full kitchen staging project in a single afternoon.
What should I avoid putting in a staged kitchen?
Avoid personal photos, religious items, collections, and anything that feels too specific to your lifestyle. Also skip strong air fresheners and overcrowded counters. The goal is to let buyers imagine their own life in the space.