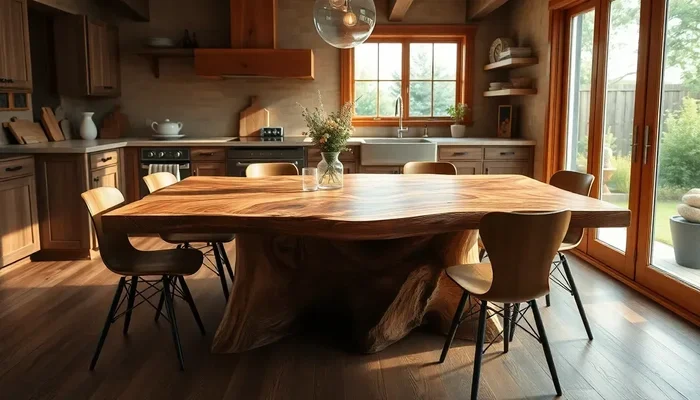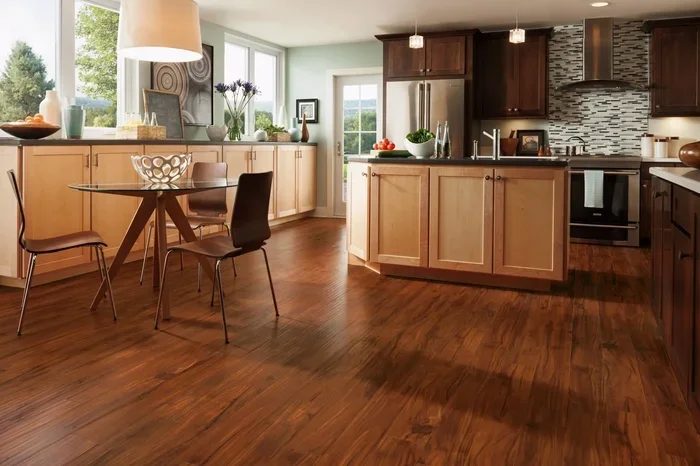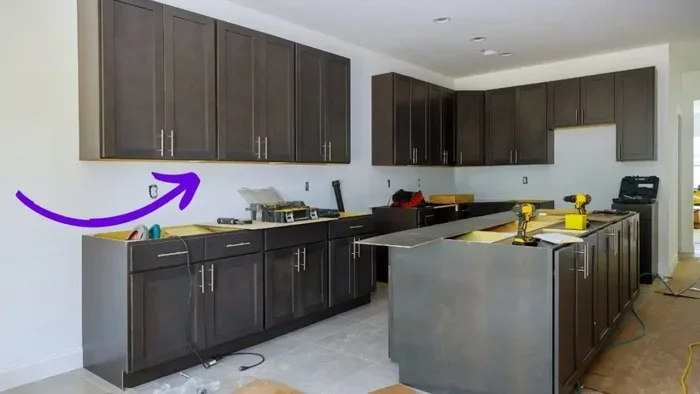
Kitchen cabinets should generally be flush with the wall for a clean, seamless look and to prevent dust buildup in gaps. When cabinets sit flush against the wall, they create a sleek modern appearance that is easier to clean and maintains a polished kitchen aesthetic. However, slight gaps may be acceptable or even intentional depending on your wall surface, cabinet type, and installation method, so understanding your specific setup matters before making a final decision.
Should Your Kitchen Cabinets Be Flush With the Wall
Should kitchen cabinets be flush with wall surfaces? This is one of the most common questions homeowners ask during a kitchen renovation. The short answer is yes, in most cases. But there are important details you need to understand before making this decision.
When your kitchen cabinets sit perfectly flat against the wall, the result looks clean, polished, and professional. A flush mount cabinet setup eliminates awkward gaps that collect dust and grease. It also creates the illusion of a larger, more organized space. Whether you are planning a full kitchen remodeling project or just updating your existing setup, understanding flush cabinet installation is essential. In this guide, we will walk you through everything you need to know to get the perfect fit.
Your kitchen is the heart of your home. It is where you prep meals, share coffee with family, and even enjoy late-night snacks. If your cabinets do not sit properly against the wall, the entire look and feel of the room suffers. A gap between cabinet and wall can trap crumbs, attract pests, and make your space feel unfinished. That is why getting the cabinet alignment right matters so much.
Key Takeaways
- Flush cabinets create a seamless look: they hide gaps and debris.
- Non-flush designs trap dust: cleaning behind cabinets becomes harder.
- Measure wall alignment first: avoid costly rework during installation.
- Wall material affects mounting: drywall needs different techniques for flush fit.
- Hire a pro for leveling: ensures a tight, gap-free fit.
- Flush cabinets increase home value: appealing to future buyers.
📑 Table of Contents
Why Cabinet Flushness Matters in Kitchen Design
The way your cabinets meet the wall affects more than just looks. It impacts cleanliness, airflow, and even the lifespan of your cabinetry. Let us break down why this detail deserves your attention.
Aesthetics and Visual Flow
Homeowners love a clean, streamlined kitchen. When cabinets sit flush against the wall, the eye moves smoothly across the space. There are no visual interruptions or awkward shadows. This creates a sense of order and calm in the room. If you have ever noticed a visible gap behind your base cabinets, you know how distracting it can be. A proper wall finish combined with flush cabinets makes the entire kitchen look intentional and well-planned.
Ease of Cleaning
This is a big one. Gaps between cabinets and walls collect dust, grease, and food particles. Over time, this buildup becomes a breeding ground for bacteria and even mold. When your cabinet spacing is tight against the wall, wiping down the backsplash and wall surface becomes much simpler. You do not have to reach behind cabinets every weekend to clean up hidden grime.
Preventing Pest Entry
Small cracks and gaps are invitations for insects and rodents. Cockroaches, ants, and even mice can squeeze through tiny spaces between your cabinets and the wall. A flush installation removes these entry points. This is especially important in older homes where wall surfaces may not be perfectly flat.
Flush vs. Gap Cabinets: What You Need to Know
Not every kitchen is the same. Some wall surfaces are uneven, and some cabinet styles work better with a small gap. Let us look at the two main approaches and when each one makes sense.
The Flush Approach
Flush cabinets sit directly against the wall with no visible gap. This requires a smooth, even wall surface behind the cabinets. Wall preparation is key here. You may need to patch holes, sand down bumps, or add a layer of drywall mud to create a flat surface. Once the wall is ready, the cabinets mount tightly against it. The result is a sleek, modern look that many homeowners prefer.
The Gap Approach
Some installers leave a small gap between the cabinet back and the wall. This is common in older homes with uneven surfaces. A gap can also be intentional when you plan to run electrical wiring or plumbing behind the cabinets. However, this approach requires gap filler or trim molding to hide the space. Without proper treatment, the gap can become an eyesore and a cleaning nightmare.
Comparison Table: Flush vs. Gap Cabinets
| Factor | Flush Cabinets | Gap Cabinets |
|---|---|---|
| Visual Appearance | Clean and modern | Can look unfinished |
| Cleaning Ease | Very easy | Difficult to access gaps |
| Pest Prevention | Excellent | Potential entry points |
| Wall Prep Required | High | Minimal |
| Installation Complexity | Moderate to high | Lower |
| Best For | Modern and renovated kitchens | Older homes with uneven walls |
Most modern kitchen design trends favor the flush approach. It gives your space a polished, high-end feel. But the right choice depends on your wall condition, budget, and personal style.
How to Prepare Your Wall for Flush Cabinet Installation
Wall preparation is the most overlooked step in cabinet installation. If you skip this phase, even the best cabinets will not sit flush against the wall. Here is how to do it right.
Step 1: Inspect the Wall Surface
Start by examining the wall behind where your cabinets will go. Look for bumps, holes, cracks, and uneven areas. Use a straight edge or a level to check for high and low spots. The wall should be flat and smooth before you mount anything. If you are planning to cook up something delicious in your new kitchen, like a slow roast lamb with potatoes underneath, you want a kitchen that works beautifully from top to bottom.
Step 2: Patch and Sand
Fill any holes or cracks with drywall compound. Let it dry completely, then sand it smooth. You may need to apply two or three coats for a perfectly flat surface. This step takes time, but it is worth every minute. A well-prepped wall ensures your cabinets sit evenly and stay flush over time.
Step 3: Prime and Finish
Once the wall is smooth, apply a coat of primer. This seals the surface and gives you a clean backdrop for your cabinets. You can also paint the wall at this stage. Choose a color that complements your cabinetry and backsplash. A coordinated wall finish ties the whole kitchen together.
Step 4: Check for Plumb
Use a level to verify that the wall is plumb (perfectly vertical). Even a slight lean can cause your cabinets to sit uneven. If the wall is out of plumb, you may need to shim the cabinets during installation to achieve a true flush fit.
Quick Tips for Wall Preparation
- Always measure the wall at multiple points before starting
- Use a laser level for the most accurate readings
- Do not rush the drying time for drywall compound
- Consider adding a backer board behind cabinets for extra stability
Common Mistakes When Installing Flush Cabinets
Even experienced DIYers make mistakes when trying to achieve a flush fit. Here are the most common errors and how to avoid them.
Skipping Wall Preparation
This is the number one mistake. Many homeowners jump straight into mounting cabinets without fixing the wall first. The result is uneven gaps, crooked alignment, and a frustrating finish. Always prep the wall before you touch a single cabinet.
Ignoring the Toe Kick
The toe kick is the space at the bottom of your cabinets, between the base and the floor. If the toe kick is not level, your cabinets will not sit flush against the wall either. Check the toe kick with a level and adjust as needed before installation.
Using the Wrong Fasteners
Not all screws and anchors work for every wall type. Drywall alone cannot hold heavy cabinets. You need to anchor into studs or use appropriate toggle bolts. Using the wrong fasteners can cause cabinets to pull away from the wall over time, ruining your flush fit.
Forgetting About Backsplash Clearance
Your kitchen backsplash needs space too. If you mount cabinets too tightly against an uneven backsplash, the cabinets will not sit flush. Plan for the backsplash thickness when measuring your cabinet spacing from the wall.
Underestimating the Need for Shims
Shims are thin pieces of material used to fill gaps and level cabinets. Many people skip shims and hope for the best. In reality, shims are essential for achieving a true flush fit on imperfect walls. Use cedar shims for durability and moisture resistance.
Expert Insight
Professional installers always check the wall with a straight edge before ordering cabinets. A wall that looks flat to the naked eye may have deviations of half an inch or more. Taking the time to measure properly saves costly mistakes later. The same attention to detail applies whether you are installing cabinets or preparing a beautiful bean salad with quinoa for your family dinner. Precision matters in the kitchen, always.
Tips for Achieving a Perfect Flush Fit
Getting your kitchen cabinets to sit perfectly flush takes patience and the right technique. Here are practical tips that make a real difference.
Use a Straight Edge Along the Wall
Before installation, run a long straight edge along the wall. Mark any high or low spots. This gives you a visual map of the wall’s imperfections. You can then address each spot before mounting the cabinets.
Install Cabinets from Top to Bottom
Start with your upper cabinets first. They are lighter and easier to level. Once the upper cabinets are secure and flush, move to the base cabinets. This approach gives you better control over the overall alignment.
Check Alignment at Multiple Points
Do not just check one spot. Use a level to verify alignment at the top, middle, and bottom of each cabinet. A cabinet can look flush at the top but be off by a quarter inch at the bottom. Checking multiple points catches these issues early.
Tighten Screws Gradually
When securing cabinets to the wall, tighten the screws gradually. Do one screw, check the alignment, then move to the next. This prevents the cabinet from shifting unexpectedly and helps you maintain a consistent flush position.
Consider a Crown Molding or Trim
If your wall has minor imperfections that you cannot fully fix, consider adding trim molding at the top of the cabinets. Crown molding covers the gap between the cabinet top and the ceiling, drawing the eye upward and masking small alignment issues. This is a smart finishing touch that elevates the entire look of your kitchen.
Key Takeaways for Flush Cabinet Installation
- Wall preparation is the foundation of a flush fit
- Always use a level to check both the wall and the cabinets
- Shims are your best friend for uneven surfaces
- Take your time and check alignment at multiple points
- A small investment in prep work saves major headaches later
When to Hire a Professional vs. DIY
Deciding between a DIY approach and hiring a professional depends on your skill level, budget, and the condition of your walls.
DIY Is Right For You If
- You have basic carpentry and cabinet leveling experience
- Your walls are relatively flat and in good condition
- You have the right tools, including a level, drill, and stud finder
- You have time to devote to careful preparation and installation
- You feel confident shimming and adjusting cabinets as needed
Hire a Professional If
- Your walls have significant uneven areas or structural issues
- You are planning a major kitchen layout change
- You are installing heavy custom cabinets that require precise mounting
- You want a guaranteed flush finish with no visible gaps
- You are balancing multiple kitchen renovation tasks and need expert help
Professional installers bring experience and specialized tools to the job. They can spot problems early and adjust on the fly. However, a skilled DIYer can achieve excellent results with patience and careful planning. If you are unsure, consider consulting a professional for a quick assessment before starting your project.
Your kitchen is more than just a room for cooking. It is a space where memories are made. Whether you are whipping up a quick weeknight meal or hosting a weekend dinner party, your kitchen setup should work for you. A beautiful Greek beans with feta deserves to be served in a kitchen that looks and feels its best. Getting your cabinets flush against the wall is one of the simplest ways to elevate the entire space.
Remember, the goal is not just to follow a trend. The goal is to create a kitchen that feels right for you. A flush cabinet installation delivers a clean, polished look that stands the test of time. It makes cleaning easier, prevents pest problems, and gives your kitchen a professional finish. Take the time to prepare your walls properly, use the right tools, and do not rush the process. Your kitchen will thank you every single day.
Whether you are starting a full kitchen remodeling project or simply updating your cabinet installation, the flush approach is almost always the right call. It is a detail that may seem small, but it makes a big difference in how your kitchen looks, feels, and functions. Start with your walls, plan your cabinet alignment carefully, and enjoy the satisfaction of a job done well.
Frequently Asked Questions
Should Kitchen Cabinets Be Flush With the Wall?
Yes, kitchen cabinets should sit as flush with the wall as possible for a clean, polished look. A tight fit also prevents dust and crumbs from collecting in gaps behind the cabinets. However, slight variations are normal due to wall imperfections and construction tolerances.
What Causes Gaps Between Kitchen Cabinets and the Wall?
Gaps often appear because walls are not perfectly straight or level, especially in older homes. Plaster, drywall, and uneven back panels can all contribute to small spaces between the cabinet and the wall surface.
How Do You Fill the Gap When Kitchen Cabinets Are Not Flush With the Wall?
You can use caulk, foam backer rods, or custom trim pieces to fill small gaps effectively. For larger gaps, consider adding a filler strip or shimming the cabinet during installation to bring it closer to the wall.
Is It Okay to Leave a Small Gap Behind Kitchen Cabinets?
A small gap of about a quarter inch is generally acceptable and often unavoidable. You can conceal it with caulk or trim molding to keep the appearance neat without major reconstruction effort.
Should You Caulk the Gap Between Kitchen Cabinets and the Wall?
Yes, caulking the gap is a simple and effective way to create a seamless finish. Use paintable silicone caulk so it matches your wall color and stays flexible over time without cracking.
Can You Install Kitchen Cabinets Flush With the Wall on Plaster Surfaces?
It is possible, but plaster walls often have uneven surfaces that make a perfect flush fit challenging. Using adjustable cabinet mounts or shims behind the cabinet helps you achieve a closer fit even on irregular plaster walls.