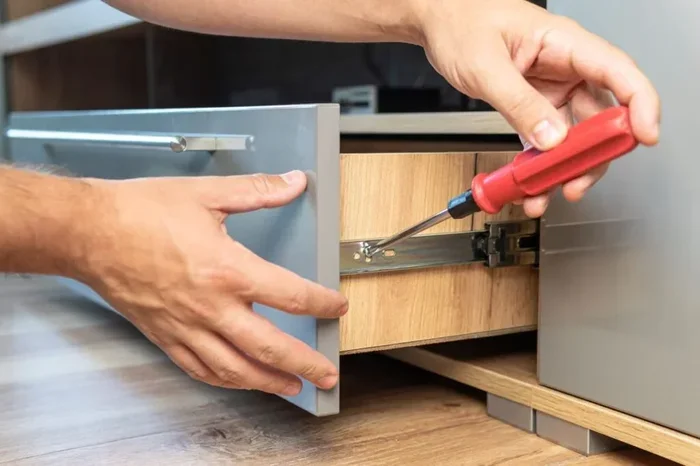
Learning how to fix kitchen drawers is easier than most homeowners think. With a few basic tools and this detailed guide, you can repair sticky slides, misaligned tracks, and broken hardware in under an hour. Fix kitchen drawers yourself and avoid costly professional repairs while keeping your kitchen running smoothly.
Nothing ruins a morning routine faster than a kitchen drawer that sticks, jams, or won’t close all the way. You reach for a spoon and suddenly the drawer fights you every step of the way. Fixing kitchen drawers is one of those small home repairs that feels intimidating but is actually really straightforward.
Most drawer problems come from a few common causes. The slides wear out over time. Screws loosen from daily use. Wood expands and contracts with changes in humidity. Whatever the reason, fixing kitchen drawers at home is something almost anyone can do. You do not need expensive tools or years of experience. A few household items and about thirty minutes of your time are usually all it takes.
This guide walks you through every step of the process. We cover how to diagnose the problem, what tools you need, and exactly how to fix kitchen drawers that stick, slide unevenly, or make annoying noises. By the end, you will feel confident tackling the repair yourself. Let us get those drawers working like new again.
Key Takeaways
- Identify the problem first: Most drawer issues fall into a few common categories like sticky slides, loose hardware, or misalignment.
- You only need basic tools: A screwdriver, pliers, lubricant, and a level are usually enough to fix kitchen drawers.
- Replace drawer slides when worn: Worn or damaged slides are the leading cause of sticking and jamming.
- Regular maintenance prevents future problems: Cleaning and lubricating slides every few months keeps drawers gliding smoothly.
- Soft close hardware upgrades are worth it: Retrofitting older drawers with soft close mechanisms adds comfort and extends drawer life.
- Fix kitchen drawers yourself to save money: Most repairs cost under ten dollars and take less than an hour.
- Know when to call a pro: Severely damaged cabinet boxes or broken wood may need professional attention.
📑 Table of Contents
- Why Kitchen Drawers Stop Working Properly
- Tools You Need to Fix Kitchen Drawers
- Step-by-Step Guide to Fix Kitchen Drawers
- How to Replace Drawer Slides Completely
- Preventing Future Drawer Problems
- Common Mistakes to Avoid When Fixing Kitchen Drawers
- When to Call a Professional for Kitchen Drawer Repair
- Expert Tips for Long-Lasting Drawer Performance
- Key Takeaways
- Frequently Asked Questions
- Conclusion
Why Kitchen Drawers Stop Working Properly
Before you grab a screwdriver, it helps to understand what went wrong. Fixing kitchen drawers starts with knowing the root cause. Different problems need different solutions, so a quick diagnosis saves you time and effort.
Common Causes of Drawer Problems
Drawers go through a lot of wear and tear. Here are the most frequent reasons they stop working well:
- Worn drawer slides: The metal tracks or rollers wear down after years of opening and closing. This is the number one cause of sticky drawers.
- Loose screws and hardware: Vibration from daily use loosens screws over time. Loose slides cause uneven movement and misalignment.
- Humidity and moisture: Wood expands when it absorbs moisture. This can cause drawers to swell and stick in their frames.
- Debris buildup: Food crumbs, grease, and dust collect on slides and tracks. This gunk creates friction and slows drawer movement.
- Damaged drawer bottom: A cracked or warped drawer bottom shifts the entire drawer out of position.
- Overloading: Putting too much weight in a drawer strains the slides and can bend or break them.
How to Diagnose Your Drawer Issue
Start by pulling the drawer all the way out. Look at the slides on both sides. Check for visible damage, rust, or wear. Run your hand along the track and feel for rough spots or debris. Next, look at the drawer itself. Is it level? Does it wobble? A simple drawer alignment check often reveals the problem right away.
If the drawer slides open and closed smoothly when you hold it, the problem is likely the slides. If it still sticks even when you hold it, the drawer box itself may be warped or damaged. This distinction matters because it determines whether you need to replace drawer slides or repair the wooden frame.
Tools You Need to Fix Kitchen Drawers
One of the best things about fixing kitchen drawers is that you probably already own most of the tools you need. You do not have to buy anything fancy. Here is a simple list of what works best.
Essential Tools for Drawer Repair
- Screwdriver set: Both flathead and Phillips head. Most drawer screws use these two types.
- Needle-nose pliers: Helpful for pulling out old screws and holding small parts.
- Rubber mallet or hammer: For gently tapping parts back into place without damaging wood.
- Level: A small bubble level helps you check drawer alignment.
- Sandpaper (medium and fine grit): For smoothing rough spots on wooden drawer components.
- Lubricant: Silicone spray or paraffin wax works great for metal slides.
- Measuring tape: Important when replacing slides to ensure the right size.
- Vacuum or cloth: For cleaning debris from tracks and slides before repair.
Optional but Helpful Tools
These are not strictly necessary, but they make the job even easier:
- Drill with driver bit: Speeds up screw removal and installation.
- Flashlight: Helps you see inside dark cabinet spaces.
- Wood glue: Useful for repairing cracked drawer boxes.
- Replacement slides: Keep a few sizes on hand for quick swaps.
Step-by-Step Guide to Fix Kitchen Drawers
Now for the hands-on part. Fixing kitchen drawers follows a clear process once you know the steps. We break it down so it is easy to follow.
Step One: Remove the Drawer
Start by emptying the drawer completely. Then pull it out about halfway. Look underneath for release tabs or levers. Many modern drawers have a release mechanism that lets you lift the drawer off the slides. If yours does not have a release, you may need to lift the back of the drawer slightly to free it from the tracks.
Set the drawer on a flat surface like a table or countertop. Lay a towel underneath to protect the wood and make it easier to work on.
Step Two: Clean the Slides and Tracks
This step is quick but important. Use a vacuum or a damp cloth to remove all dust, crumbs, and grime from the slides and the cabinet tracks. Old buildup creates friction that makes drawers stick. You would be surprised how much difference a simple cleaning makes.
For tough grime, spray a little white vinegar on the tracks and wipe clean. Let everything dry completely before moving to the next step.
Step Three: Inspect and Replace Worn Slides
Look closely at the slides. If you see rust, cracks, or worn-out roller wheels, it is time to replace drawer slides. Most hardware stores carry a wide selection of replacement slides. Bring the old slide with you or take a photo and measure it carefully to get the right match.
To remove old slides, unscrew them from both the drawer and the cabinet. Install the new slides by following the manufacturer instructions. Make sure they are aligned perfectly before tightening the screws. A crooked slide will cause the same problems you are trying to fix.
Step Four: Lubricate the Slides
Once the slides are clean and properly installed, apply lubricant. A silicone-based spray is the best choice for metal slides. Spray a light, even coat on both tracks. Do not use WD-40 as a long-term solution. It attracts dust and can gum up over time.
For wooden slides, rub a candle or paraffin wax along the contact points. This creates a smooth, natural barrier that reduces friction without leaving residue.
Step Five: Reinstall the Drawer and Test
Place the drawer back onto the slides carefully. Push it in gently until you hear the click or feel it seat properly. Pull it out and push it in several times to test the movement. Use a level to check that the drawer sits flat when closed.
If the drawer still sticks, check the alignment again. Sometimes a slight adjustment to the slide position solves the problem. Tighten all screws firmly but do not overtighten, as that can strip the wood.
Step Six: Adjust the Drawer Front
Sometimes the drawer works fine mechanically but looks uneven. A crooked drawer front is an easy fix. Most drawer fronts can be adjusted by loosening the mounting screws slightly, repositioning the front, and then retightening. Use a level to make sure it lines up with the other drawers above and below.
How to Replace Drawer Slides Completely
When cleaning and minor adjustments do not solve the problem, a full drawer slide replacement is the way to go. This is one of the most common kitchen drawer repair jobs, and it is surprisingly simple.
Types of Drawer Slides
Not all slides are the same. Here are the main types you will encounter:
- Side-mount slides: The most common type. They attach to the sides of the drawer and the cabinet sides. Simple and reliable.
- Center-mount slides: Attached underneath the drawer. Common in older furniture and some kitchen cabinets.
- Undermount slides: Mounted underneath the drawer for a cleaner look. They are popular in modern kitchens.
- Soft close slides: Include a damping mechanism that slows the drawer gently as it closes. Great for reducing slamming noise.
- Heavy-duty slides: Designed for drawers that carry a lot of weight, like pots and pans drawers.
How to Measure for Replacement Slides
Getting the right size matters. Measure the full length of the old slide from end to end. Also measure the width of the drawer box. Write these measurements down before you go shopping. Most slides come in standard sizes like 12 inches, 16 inches, and 20 inches.
Make sure you match the slide type too. A side-mount slide will not work if your cabinet uses center-mount hardware. When in doubt, take the old slide to the store and ask for help matching it.
Installing New Slides
Start by attaching the slide to the drawer first. Position it evenly on both sides and screw it in place. Then install the cabinet portion of the slide. Use the mounting holes to adjust the position slightly if needed.
Test the drawer before you finish. Slide it in and out a few times. If it moves smoothly and sits flush, you are done. If not, make small adjustments to the slide position and try again.
Preventing Future Drawer Problems
The best kitchen drawer repair is the one you never have to do. Regular maintenance keeps drawers working smoothly for years. A little prevention goes a long way toward avoiding sticky, stuck, or noisy drawers.
Simple Maintenance Tips
- Clean slides every few months: Wipe them down with a damp cloth to remove dust and grease buildup.
- Lubricate slides twice a year: A quick spray of silicone or a rub of wax keeps everything moving freely.
- Do not overload drawers: Check the weight rating on your slides and stay within the limit. Overloaded drawers wear out fast.
- Tighten screws annually: Go through all your kitchen drawers once a year and check that screws are snug.
- Use drawer liners: Liner pads reduce friction and protect the drawer bottom from scratches and moisture.
- Control kitchen humidity: Use a dehumidifier if your kitchen tends to be damp. Stable humidity prevents wood swelling.
When to Upgrade Your Drawer Hardware
If your kitchen is older, consider upgrading to soft close drawer slides. They are affordable and make a noticeable difference. Instead of slamming shut, soft close drawers glide to a gentle stop. This reduces wear on both the slides and the cabinet box.
Another upgrade worth considering is full extension slides. These allow you to pull the drawer all the way out, giving you full access to the back. No more reaching into dark corners to grab that pan you forgot about.
Common Mistakes to Avoid When Fixing Kitchen Drawers
Even with the best intentions, people make mistakes when repairing drawers. Here are some common errors to watch out for.
- Using the wrong lubricant: Oil-based lubricants attract dirt and dust. Stick with silicone spray or wax for clean, long-lasting results.
- Overtightening screws: This strips the wood and weakens the hold. Tighten until snug, then stop.
- Ignoring alignment: A slide that is even slightly off will cause the drawer to bind. Always check alignment before finalizing the repair.
- Forcing a stuck drawer: If a drawer will not move, do not yank on it. This can break the slides or damage the cabinet. Diagnose the problem first.
- Buying the wrong size slides: Measure twice and buy once. Wrong-sized slides will not fit properly and you will have to repeat the process.
- Skipping the cleaning step: New slides on dirty tracks will still stick. Always clean before you install anything new.
When to Call a Professional for Kitchen Drawer Repair
Most kitchen drawer repair jobs are DIY-friendly. But some situations call for professional help. Knowing the difference saves you frustration and potentially prevents further damage.
Call a professional if the cabinet box itself is damaged. A cracked or broken cabinet frame is harder to repair than the drawer or slides. Water damage that has warped the wood also usually needs expert attention. If you have tried replacing slides and the drawer still does not work, there may be a deeper structural issue.
Also consider calling a pro if you have multiple drawers that need repair at once. A professional can often handle several repairs efficiently and may have access to higher-quality replacement parts. The cost is usually reasonable for multi-drawer jobs.
Expert Tips for Long-Lasting Drawer Performance
Professional carpenters and kitchen remodelers share a few tips that make a real difference. These small habits keep drawers working well for decades.
First, always use both slides as a pair. Replacing only one slide creates uneven tension and causes the drawer to pull to one side. Replace both slides on the same drawer at the same time.
Second, wax the wooden rails on traditional wooden-slide drawers. A coat of beeswax creates a natural barrier against moisture and friction. This simple step extends the life of wooden slides significantly.
Third, check the drawer rollers regularly. Rollers wear out faster than people expect. If you hear grinding or squeaking, inspect the rollers and replace them if needed. Catching worn rollers early prevents damage to the slides and cabinet.
Fourth, keep a small maintenance log. Note when you last cleaned and lubricated each drawer. This helps you stay on top of routine upkeep and catches problems before they become serious.
Key Takeaways
- Diagnose first: Most drawer problems come from worn slides, loose screws, or debris buildup.
- Basic tools are enough: A screwdriver, pliers, lubricant, and a level handle most kitchen drawer repair jobs.
- Clean before you repair: Removing grime from slides and tracks often solves sticking issues without any other work.
- Replace slides when needed: Worn or damaged slides are the leading cause of drawer problems. Replacing drawer slides is simple and affordable.
- Lubricate regularly: Silicone spray or paraffin wax keeps metal and wooden slides working smoothly.
- Maintain to prevent problems: Regular cleaning and tightening of screws keeps drawers in great shape year after year.
- Know your limits: Call a professional for structural damage or when multiple repairs are needed at once.
Frequently Asked Questions
What is the easiest way to fix a sticky kitchen drawer?
The easiest fix is to clean the slides and tracks thoroughly, then apply a silicone-based lubricant. Most sticky drawers are caused by dust and grime buildup, not a broken part. After cleaning and lubricating, the drawer should glide smoothly again. This simple fix takes about ten minutes and costs almost nothing.
How do I know if I need to replace the drawer slides?
If cleaning and lubricating the slides does not fix the problem, the slides are likely worn out. Look for visible rust, cracks, or worn roller wheels on the slides. If the drawer still sticks or slides unevenly after cleaning, it is time to replace drawer slides. Replacement slides are inexpensive and easy to install.
Can I fix a drawer that is crooked or not closing flush?
Yes, a crooked drawer is usually an easy adjustment. Loosen the screws on the slides slightly, reposition the drawer, and retighten. Use a level to check that the drawer sits flat when closed. Sometimes adjusting just one slide by a small amount solves the problem completely.
What lubricant works best for kitchen drawer slides?
Silicone spray is the best lubricant for metal drawer slides. It creates a smooth, clean surface without attracting dust or dirt. For wooden slides, paraffin wax or beeswax works great. Avoid oil-based lubricants like WD-40 for long-term use because they attract grime and can make the problem worse over time.
How much does it cost to replace drawer slides?
Replacement slides cost between five and fifteen dollars per pair at most hardware stores. If you do the repair yourself, the total cost is very low. A professional may charge fifty to one hundred dollars per drawer including labor. Fixing kitchen drawers yourself saves you a significant amount of money compared to hiring someone.
How often should I maintain my kitchen drawers?
A quick cleaning and lubrication every three to six months keeps drawers working well. Tighten screws at least once a year. If you notice any sticking or noise, check the slides right away. Catching small problems early prevents them from becoming bigger, more expensive repairs later.
Conclusion
Fixing kitchen drawers is one of the most satisfying home repairs you can do. It is quick, affordable, and does not require special skills or expensive tools. Most drawer problems come down to a few simple causes, and each one has a straightforward solution.
Start by diagnosing the problem. Clean the slides, check for loose hardware, and inspect for wear. Replace damaged slides if needed and lubricate everything properly. With these steps, your drawers will glide smoothly again in less than an hour.
Remember that prevention is the best repair. Regular cleaning, lubrication, and tightening of screws keep kitchen drawer repair needs to a minimum. A little maintenance goes a long way toward avoiding future problems.
Now that you know how to fix kitchen drawers, grab your tools and tackle that sticky drawer today. You will be amazed at how much better your kitchen feels when every drawer opens and closes with ease. Your future self will thank you every time you reach for a mug or a plate without a single struggle.