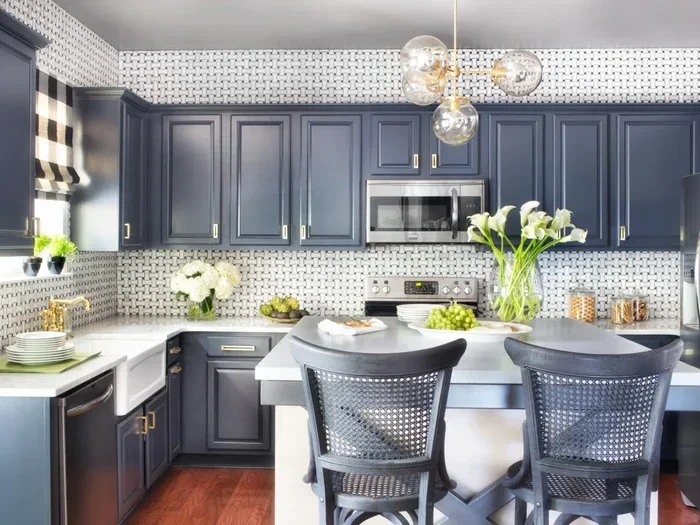
Yes, you can paint kitchen cabinets and transform your kitchen without spending thousands on replacements. This guide walks you through every step from prep work to the final coat, so your cabinet painting project looks professional and lasts for years. Whether you use a brush, roller, or sprayer, the right technique makes all the difference.
Have you been staring at your kitchen and thinking it is time for a change? You do not have to tear out every cabinet and start over. The answer to can you paint kitchen cabinets is a resounding yes. Painting cabinets is one of the most impactful and budget-friendly ways to give your kitchen a completely new look. Many homeowners worry that the job is too hard or that the result will look cheap. But with the right approach, your cabinets can look like they came from a high-end showroom.
This guide breaks down the entire process into simple, easy-to-follow steps. You will learn what supplies you need, how to prep your surfaces, the best painting techniques, and how to avoid common mistakes. By the end, you will feel confident enough to start your own cabinet makeover project this weekend. Let us dive in.
Key Takeaways
- Painting cabinets saves money: A fresh coat of paint costs a fraction of replacing cabinets and delivers a dramatic kitchen transformation.
- Proper prep is the secret: Cleaning, sanding, and priming cabinets ensures the paint adheres well and the finish looks smooth.
- Choose the right paint: Latex or acrylic enamel paints work best for cabinet surfaces and offer durability.
- Remove hardware first: Taking off hinges, pulls, and doors makes the job easier and gives you a cleaner result.
- Patience pays off: Letting each coat dry fully and applying multiple thin layers prevents drips, bubbles, and peeling.
- Maintenance keeps cabinets looking new: Gentle cleaning and periodic touch-ups extend the life of your painted cabinets for years.
📑 Table of Contents
Why Painting Kitchen Cabinets Is Worth It
Before we get into the how-to, let us talk about why this project is so popular. The kitchen is often the most used room in a home. And cabinets take up a huge part of the visual space. When cabinets look outdated, worn, or boring, the whole room feels tired.
Here are some reasons why a cabinet painting project makes sense:
- Cost savings: New custom cabinets can cost thousands of dollars. A paint job might set you back just $200 to $500 in supplies.
- Instant transformation: A fresh color completely changes the mood and style of your kitchen.
- Increased home value: A updated kitchen is one of the top features buyers look for when selling a home.
- Creative freedom: You can choose any color, finish, or style that matches your vision.
- Less waste: Repainting is far more eco-friendly than replacing and sending old cabinets to a landfill.
So when someone asks can you paint kitchen cabinets, the real question should be why would you not? The benefits are clear and the results speak for themselves.
What You Need Before You Start
Preparation is the foundation of any great paint job. Gathering your supplies ahead of time keeps the process smooth and prevents frustrating delays. Here is your checklist for a successful kitchen cabinet painting project.
Essential Supplies
- Screwdriver set: For removing hinges, handles, and any hardware from your cabinet doors and frames.
- TSP substitute or degreaser: Kitchen cabinets collect grease and grime over time. A good cleaner cuts through it all.
- Sandpaper (120 to 220 grit): You need this to create a rough surface so paint grips properly.
- Tack cloth or damp rag: For wiping away dust after sanding.
- Primer: A quality bonding primer is essential. Look for one designed specifically for kitchen cabinets.
- Paint: Acrylic latex enamel or chalk paint are popular choices. Pick a finish that suits your style.
- Paint brushes and mini rollers: A good angled brush gets into corners, and a small roller gives smooth coverage on flat surfaces.
- Paint tray and liner: For easy access to your paint while working.
- Painter’s tape: Protects areas you do not want painted.
- Drop cloths or plastic sheeting: Keep your floors and counters protected.
- Screwdriver organizer or zip bags: To keep all hardware labeled and organized during the project.
Choosing the Right Paint
Not all paints are created equal. When it comes to cabinet refinishing, you want something durable and easy to clean. Latex enamel is a top choice because it offers a hard, smooth finish that resists kitchen moisture and daily wear. Chalk paint gives a matte, vintage look but may require a wax sealant for protection. Acrylic paint dries fast and has low odor, which is great if you need to paint indoors.
Avoid basic wall paint for cabinets. It is not tough enough to handle the constant use and cleaning that kitchen surfaces face. Investing in a quality paint finish designed for cabinets saves you from repainting sooner.
Step-by-Step Process to Paint Kitchen Cabinets
Now for the part you have been waiting for. Here is exactly how to repaint cabinets like a pro. Follow each step carefully and your results will speak for themselves.
Step 1: Remove All Cabinet Hardware and Doors
Start by taking off every hinge, handle, knob, and pull from your cabinets. Use a screwdriver and place each piece in a labeled bag or container. Remove the cabinet doors from their hinges as well. Number each door and its frame with painter’s tape so you know exactly where they go back. This step makes the rest of the job much easier and gives you access to every surface.
Step 2: Clean the Surfaces Thoroughly
Kitchen cabinets collect years of grease, cooking splatter, and dust. Before you sand or paint, you must clean them. Use a TSP substitute mixed with warm water and a clean cloth. Wipe down every door, frame, and drawer front. Pay extra attention to areas around handles and near the stove. Let the surfaces dry completely before moving on.
Step 3: Sand the Cabinets
Sanding is the step most people skip, and it is the reason many paint jobs fail. You do not need to strip the old finish completely. Just lightly sand all surfaces with 120 to 150 grit sandpaper to create a rough texture. This gives the primer something to grab onto. After sanding, wipe every surface with a tack cloth to remove all dust.
Pro tip: If your cabinets have a glossy finish, use a deglosser liquid instead of heavy sanding. It works quickly and smooths the surface for better paint adhesion.
Step 4: Apply Primer
Primer is not optional. It seals the surface, blocks stains, and helps the paint go on evenly. Apply a thin, even coat of cabinet primer using a quality brush or mini roller. Work in sections and avoid going over wet paint too much. Let the primer dry according to the manufacturer’s instructions, usually one to two hours. Lightly sand again with 220 grit sandpaper between coats if needed.
Step 5: Paint the Cabinets
This is where the magic happens. Apply the first coat of your chosen cabinet paint in thin, even strokes. Use an angled brush for edges and details, and a small roller for flat panels. Avoid loading too much paint on your brush to prevent drips and brush marks.
Let the first coat dry completely. Most paints need at least two to four hours between coats. Apply a second coat, and if needed a third, for full, even coverage. Thin layers always look better than one thick coat. They dry faster, resist drips, and create a smoother finish.
Step 6: Reassemble the Cabinets
Once all the paint is fully dry, carefully reattach the doors, drawers, and hardware. Use your labels and photos to make sure everything goes back in the right place. Stand back and admire your handiwork. Your kitchen just got a serious upgrade.
Common Mistakes to Avoid
Even with the best intentions, mistakes happen. Here are the most common errors people make when they paint kitchen cabinets and how to avoid them.
- Skipping the cleaning step: Grease and dirt prevent paint from sticking. Always clean before you sand and prime.
- Skipping the primer: Paint alone on bare or glossy wood often peels or chips within months.
- Applying thick coats: Thick paint takes longer to dry and is more likely to drip, bubble, or crack.
- Not sanding enough: A smooth surface without texture causes paint to slide off and peel away.
- Rushing the drying time: Reassembling or using cabinets before the paint fully cures leads to sticky doors and smudges.
- Using the wrong paint: Cheap wall paint does not hold up in a kitchen environment. Always use paint designed for cabinets or high-traffic surfaces.
- Forgetting to remove hardware: Painting over hinges and handles leads to messy edges and a sloppy finish.
Avoiding these mistakes saves you time, money, and the frustration of redoing work. Take your time and do each step right.
Tips for a Professional-Quality Finish
You do not need to be a professional to get great results. A few simple tips can make your cabinet transformation look like it was done by an expert.
Use a Paint Sprayer for Large Projects
If you have many cabinets or want the smoothest possible finish, consider renting or buying a paint sprayer. A sprayer applies paint evenly and eliminates brush marks. Just make sure to mask off surrounding areas and work in a well-ventilated space.
Invest in Quality Brushes
A cheap brush leaves visible strokes and bristle marks. A high-quality angled sash brush glides smoothly and gives you more control in tight spaces. Look for brushes labeled for use with enamel or latex paints.
Paint in a Dust-Free Environment
Dust settling on wet paint creates a rough, bumpy texture. Close windows, turn off fans, and paint when the humidity is low. If possible, work in a clean, enclosed space.
Add a Protective Topcoat
For extra durability, apply a thin layer of polyurethane finish over your painted cabinets. This adds a protective layer that resists scratches, moisture, and daily use. Choose a water-based polyurethane for easy cleanup and low odor.
Keep Your Brush Strokes Consistent
Always paint in the same direction and use long, smooth strokes. Overlapping wet edges prevents visible lines and lap marks. Work systematically from top to bottom so you do not accidentally touch a fresh surface.
How Long Does It Take and How to Maintain Painted Cabinets
The time it takes to repaint cabinets depends on the size of your kitchen and how many coats you apply. For a standard kitchen with about 30 cabinets, expect the project to take two to four days including drying time. If you use a paint sprayer, you can speed up the application process significantly.
Once your cabinets are painted, maintenance is simple. Here is how to keep them looking great:
- Wipe spills and splatters promptly with a soft damp cloth.
- Use a gentle cleaner, not harsh abrasives that can scratch the paint.
- Avoid soaking cabinets with water, especially around sink areas.
- Touch up any chips or scratches with leftover paint as soon as you notice them.
- Reapply a protective topcoat every few years if the finish starts to look worn.
With proper care, painted cabinets can look beautiful for a decade or more. The cabinet painting journey does not end when the last brushstroke dries. Regular maintenance keeps your investment looking fresh and protects your hard work.
Frequently Asked Questions
Can you paint kitchen cabinets without sanding them first?
You can, but it is not recommended. Sanding creates a rough texture that helps primer and paint stick properly. If you absolutely cannot sand, use a liquid deglosser or a bonding primer designed to adhere to smooth surfaces. Even with these products, the paint may not last as long without any surface preparation.
What is the best paint for kitchen cabinets?
Acrylic latex enamel is widely considered the best paint for kitchen cabinets. It is durable, easy to clean, and resists moisture and kitchen wear. Chalk paint is another popular option for a matte vintage look, but it usually needs a wax or topcoat sealant for protection in a high-use kitchen environment.
How many coats of paint do you need on kitchen cabinets?
Most cabinet painting projects require two to three coats of paint after the primer has dried. The first coat may look uneven, which is completely normal. The second coat provides full coverage, and a third coat adds extra richness and durability. Always let each coat dry fully before applying the next one.
Is it cheaper to paint cabinets or buy new ones?
Painting cabinets is significantly cheaper than buying new ones. A full set of new custom cabinets can cost anywhere from $5,000 to $15,000 or more. A cabinet makeover with paint and supplies typically costs between $200 and $500. The savings are substantial, and the results can be just as impressive.
How long should cabinets dry between coats?
Most cabinet paints need two to four hours of drying time between coats. However, always check the manufacturer’s instructions on the paint can. Humidity, temperature, and coat thickness can all affect drying time. It is better to wait an extra hour than to apply the next coat too soon and risk bubbles or uneven texture.
Can you paint laminate kitchen cabinets?
Yes, you can paint laminate cabinets, but preparation is extra important. Laminate surfaces are smooth and non-porous, so they need thorough cleaning, light sanding, and a bonding primer. Without proper prep, paint may peel or chip over time. Once primed correctly, laminate cabinets accept paint just as well as wood cabinets.
Final Thoughts
Can you paint kitchen cabinets? Absolutely, and now you know exactly how to do it right. From cleaning and sanding to priming and painting, every step plays a role in creating a beautiful, long-lasting finish. This project is one of the best ways to refresh your kitchen without the huge expense of a full remodel.
Take your time, gather the right supplies, and follow each step carefully. The results will surprise you. Your kitchen will feel brand new, and you will have the satisfaction of knowing you did it yourself. So grab your brush, put on some music, and start your cabinet painting journey today. Your dream kitchen is just a few coats away.