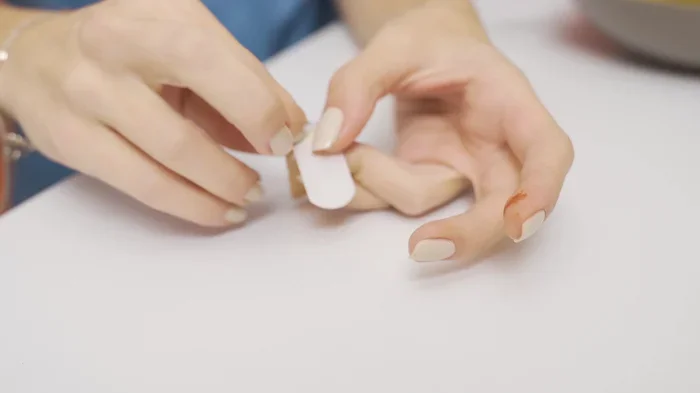
A cut finger with a kitchen knife is more common than you think, and knowing the right first steps can make all the difference. This guide walks you through immediate first aid for cuts, how to stop bleeding, clean the wound, and decide when to see a doctor. We also share kitchen safety tips and easy no-cook meals to enjoy while your finger heals.
Key Takeaways
- Act fast: Apply direct pressure and elevate your hand to stop bleeding quickly after a cut finger with a kitchen knife.
- Clean properly: Rinse the wound with cool running water and mild soap to prevent infection and promote healing.
- Know when to seek help: Deep cuts, heavy bleeding, or loss of feeling need medical attention right away.
- Prevent future injuries: Use sharp knives, a stable cutting board, and proper hand positioning to stay safe in the kitchen.
- Eat easy meals while healing: No-cook recipes like no mayo potato salad with bacon and shrimp tacos keep you fed without straining your injured hand.
📑 Table of Contents
- What to Do When You Cut Your Finger with a Kitchen Knife
- Step 1: Stay Calm and Assess the Cut
- Step 2: Stop the Bleeding
- Step 3: Clean the Wound Properly
- Step 4: Bandage and Protect the Cut
- Step 5: Know When to Seek Medical Help
- How to Prevent Cuts in the Kitchen
- Easy Meals to Enjoy While Your Finger Heals
- Common Mistakes People Make After a Kitchen Cut
- Expert Insight: How a Chef Handles Kitchen Cuts
- Key Takeaways
- Conclusion
What to Do When You Cut Your Finger with a Kitchen Knife
You are chopping vegetables for dinner. The knife slips. Suddenly, you are staring at a cut on your finger, and blood is pooling on the cutting board. It happens to the best of us. A cut finger with a kitchen knife is one of the most common kitchen injuries people face every day. Whether you are a seasoned home cook or a beginner learning to chop onions, this type of hand injury can catch you off guard.
The good news? Most minor cuts heal well with quick and proper care. The steps you take in the first few minutes matter a lot. This guide gives you a clear, simple plan to follow. You will learn how to stop the bleeding, clean the wound, bandage it, and know when a doctor is needed. We also share practical kitchen safety tips to help you avoid this painful experience in the future.
Let us walk through this together. No panic. No fluff. Just clear, helpful steps you can use right now.
Step 1: Stay Calm and Assess the Cut
First things first. Take a deep breath. A minor cut from a sharp knife can look alarming, but most of these injuries are manageable at home. The key is to stay calm and figure out how serious the wound is. Panicking can raise your heart rate, which may increase blood flow and make the bleeding worse.
Ask yourself a few quick questions:
- How deep is the cut? Does it go through the skin or just the surface?
- Is the bleeding light, moderate, or heavy?
- Can you move your finger without sharp pain?
- Is there any numbness or loss of feeling in the finger?
If the cut is shallow and the bleeding is light, you can handle it at home. If the wound is deep, the bleeding will not stop, or you feel numbness, seek medical help immediately. Do not wait. A deep finger cut may need stitches or professional wound care.
What Does a Minor Cut Look Like?
A minor kitchen cut usually affects only the top layers of skin. You may see a thin line of redness, a small amount of blood, and mild tenderness. These cuts typically stop bleeding within a few minutes and heal in less than a week. They do not usually require a trip to the emergency room.
Step 2: Stop the Bleeding
Once you have assessed the situation, your next goal is to stop the bleeding. This is the most important first aid step for any cut finger with a kitchen knife. Here is exactly what to do:
- Grab a clean cloth or gauze. A fresh dish towel, paper towel, or sterile gauze pad works great. Avoid using dirty rags because they can introduce bacteria into the wound.
- Apply firm, direct pressure. Press the cloth gently but firmly against the cut. Do not lift it to check every few seconds. Keep pressure steady for at least 5 to 10 minutes.
- Elevate your hand above your heart. Raise your injured hand up in the air. This helps reduce blood flow to the area and slows the bleeding naturally.
- Wait and be patient. Resist the urge to peek. Constant pressure is what does the job. Most minor cuts will stop bleeding within 5 to 10 minutes of steady pressure.
If blood soaks through the cloth, do not remove it. Simply add another layer on top and keep pressing. Removing the first layer can disrupt the clot that is forming and restart the bleeding.
Quick Tip for Stubborn Bleeding
If the cut is on a fingertip, try pressing the cut against a clean finger of your other hand. This creates a natural pressure point that can help slow things down. It is a simple trick that works well for finger wound care at home.
Step 3: Clean the Wound Properly
Once the bleeding has stopped, it is time to clean the wound. Proper wound cleaning is essential for infection prevention. A dirty kitchen knife can carry bacteria, and food particles can enter the cut. You want to make sure the wound is as clean as possible before you bandage it.
Here is the best way to clean a kitchen cut:
- Rinse with cool running water. Hold your finger under cool tap water for 1 to 2 minutes. This flushes out dirt, food particles, and bacteria from the wound.
- Use mild soap around the cut. Gently wash the skin around the wound with mild soap. Avoid getting soap directly inside the cut because it can irritate the tissue and slow healing.
- Do not use hydrogen peroxide or rubbing alcohol. These are harsh and can damage healthy tissue. They may slow down the healing process instead of helping it.
- Pat dry with a clean towel. Gently dab the area dry. Do not rub, as this can reopen the wound or irritate the skin.
After cleaning, apply a thin layer of antibiotic ointment. This creates a protective barrier and supports the body’s natural healing process. Simple first aid for cuts like this goes a long way in preventing infection prevention problems later on.
Why Proper Cleaning Matters
A kitchen knife often touches raw meat, unwashed vegetables, and other surfaces. Any bacteria left in the wound can lead to an infection. Signs of infection include increased redness, swelling, warmth around the cut, pus, or a throbbing sensation. If you notice any of these, contact a healthcare provider right away. Early treatment of infections prevents more serious complications.
Step 4: Bandage and Protect the Cut
Now that the wound is clean and protected with ointment, it is time to bandage it. A proper bandage keeps the cut covered, absorbs any remaining blood, and protects against bacteria. For a cut finger with a kitchen knife, a simple adhesive bandage or a finger-shaped bandage works well.
Follow these steps for effective finger bandaging:
- Choose a bandage that fully covers the wound without sticking to it directly.
- Change the bandage at least once a day, or sooner if it gets wet or dirty.
- Inspect the wound each time you change the bandage for signs of infection.
- Keep the bandage dry. If you need to wash dishes, wear waterproof gloves.
For deeper cuts, consider using a butterfly bandage or a wound closure strip. These help hold the edges of the cut together and promote faster healing with less scarring. Scar prevention starts with keeping the wound closed and protected during the healing process.
When to See a Doctor for Bandaging Advice
If the cut is gaping, jagged, or too deep to close with a simple bandage, see a doctor. They can properly close the wound with stitches, medical glue, or staples. These professional methods reduce the risk of scarring and speed up recovery. Do not try to close a deep wound on your own with tape or glue from a craft store. Use proper medical supplies or seek professional help.
Step 5: Know When to Seek Medical Help
Not every kitchen knife injury can be treated at home. Some cuts require professional medical attention. Knowing the difference between a minor cut and a serious one can save you from complications.
Seek medical help right away if:
- The bleeding does not stop after 10 to 15 minutes of direct pressure.
- The cut is deep, jagged, or gaping open.
- You cannot move your finger or feel any sensation in it.
- The cut is on a joint or across a crease in the skin.
- You see exposed fat, muscle, tendon, or bone.
- The knife was dirty, rusty, or contaminated with something harmful.
- You have not had a tetanus shot in the last five years.
These are clear signs that a hand injury needs professional attention. Do not try to tough it out. A visit to an urgent care clinic or emergency room is always better than risking a serious infection or permanent damage to your finger.
What to Expect at the Doctor
If you do need medical care, the doctor will clean the wound thoroughly, possibly use a numbing agent, and close the cut with stitches or medical glue. They may also prescribe antibiotics if there is a risk of infection. Follow all aftercare instructions carefully to ensure proper finger wound care and a smooth recovery.
How to Prevent Cuts in the Kitchen
The best way to deal with a cut finger with a kitchen knife is to avoid getting one in the first place. Kitchen safety tips are simple, but they make a huge difference. Here are the most effective ways to prevent kitchen accidents involving knives:
Use Sharp Knives
It sounds counterintuitive, but a sharp knife is safer than a dull one. A dull knife requires more force to cut through food, and that extra force makes it more likely to slip and cause a hand injury. A sharp knife glides through food smoothly and gives you better control. Keep your knives properly sharpened and maintain them regularly.
Use a Stable Cutting Board
Always cut on a stable, non-slip cutting board. Place a damp paper towel or a rubber mat underneath the board to prevent it from sliding. A wobbly or unstable cutting board is one of the leading causes of kitchen knife injuries. Never cut food on a surface that moves or shifts while you are working.
Practice Proper Hand Position
How you hold the food matters just as much as how you hold the knife. Curl your fingertips inward and use your knuckles as a guide for the blade. This technique, often called the “claw grip,” keeps your fingers safe and gives you better control over the cut. It is one of the most important knife safety tips for any home cook.
Keep Your Focus on the Task
Distractions are a major cause of kitchen accidents. Do not answer your phone, watch television, or have long conversations while chopping. Keep your full attention on the knife and the food. A moment of distraction is all it takes for a minor cut to become a serious hand injury.
Store Knives Properly
Do not leave loose knives in a sink full of water or in a drawer where they can shift around. Use a knife block, a magnetic strip, or blade guards to store your knives safely. Reaching into a messy drawer and grabbing a knife by the blade is one of the fastest ways to get a cut finger with a kitchen knife.
Keep a First Aid Kit in the Kitchen
Having a basic first aid kit in or near your kitchen is a smart move. Stock it with adhesive bandages, gauze, antibiotic ointment, and clean cloths. When a minor kitchen cut happens, you want to be able to act fast without running around the house looking for supplies. Preparation is a key part of kitchen prep safety.
Easy Meals to Enjoy While Your Finger Heals
After a cut finger with a kitchen knife, cooking can feel frustrating. Chopping, slicing, and peeling all require a steady hand, and using your injured finger even with a bandage can be painful. The good news is that you do not have to go hungry. Plenty of delicious meals require little to no chopping or knife work.
No Mayo Potato Salad With Bacon is a perfect option. It uses pre-boiled potatoes and crumbled bacon, and you can tear everything by hand instead of chopping. It is creamy, smoky, and satisfying. Check out the full recipe for no mayo potato salad with bacon for an easy, hands-off meal.
Another great choice is Shrimp Tacos with Avocado Mango Salsa. The shrimp can be bought pre-cooked, and the salsa can be made by mashing ingredients with a fork instead of chopping them finely. The flavors are bright and fresh, and the recipe is simple enough to make even when your hand is not at full strength. Find the full recipe for shrimp tacos with avocado mango salsa here.
If you want something warm and hearty, Liver and Onions with Mashed Potatoes is a comforting classic. You can buy pre-sliced liver and use a fork to mash the potatoes. The rich flavors and creamy texture make it a perfect recovery meal. Get the full recipe for liver and onions with mashed potatoes for a cozy dinner that requires minimal knife work.
For a lighter option, try Bean Salad with Quinoa. It uses canned beans and pre-cooked quinoa, and everything can be tossed together in a bowl with a simple dressing. No chopping required. View the complete recipe for bean salad with quinoa for a healthy, no-fuss meal that keeps your energy up while you heal.
Common Mistakes People Make After a Kitchen Cut
Even with the best intentions, people make mistakes when treating a cut finger with a kitchen knife. Here are the most common ones to avoid:
- Using a dirty cloth to stop the bleeding. This introduces bacteria into the wound and increases the risk of infection.
- Applying too much hydrogen peroxide. It may feel like it is cleaning the wound, but it actually damages healthy cells and slows healing.
- Removing the bandage too often. Every time you pull off the bandage, you risk reopening the wound and introducing new bacteria.
- Ignoring signs of infection. Redness, swelling, warmth, and pus are not something to ignore. They mean the wound needs medical attention.
- Returning to heavy kitchen tasks too soon. Give your finger time to heal before you start chopping again. Rushing back increases the risk of reopening the cut.
Avoiding these simple mistakes can save you from a longer healing process and a more painful recovery. Proper wound care and patience are your best friends after any kitchen injury.
Expert Insight: How a Chef Handles Kitchen Cuts
Professional chefs deal with knife cuts regularly, and they have developed smart habits to minimize the risk and respond quickly when an injury happens. The most important lesson from experienced cooks is this: respect the knife, but do not fear it. A sharp knife used with proper technique is far safer than a dull one used carelessly.
Chefs also keep their workstations clean and organized. A cluttered counter leads to rushed movements, and rushed movements lead to accidents. Taking a moment to set up your workspace before you start cooking is one of the simplest kitchen safety tips you can follow. Keep your cutting board stable, your knives sharp, and your focus sharp too.
If a cut does happen, professional chefs know to act immediately. They do not wait to see how bad it is. They apply pressure, clean the wound, and assess whether they can continue working or need to take a break. This quick, calm response is something every home cook can adopt. The difference between a minor hand injury and a serious one often comes down to how fast and how well you respond.
Key Takeaways
- Act fast: Apply direct pressure and elevate your hand to stop bleeding quickly after a cut finger with a kitchen knife.
- Clean properly: Rinse the wound with cool running water and mild soap to prevent infection and promote healing.
- Know when to seek help: Deep cuts, heavy bleeding, or loss of feeling need medical attention right away.
- Prevent future injuries: Use sharp knives, a stable cutting board, and proper hand positioning to stay safe in the kitchen.
- Eat easy meals while healing: No-cook recipes like no mayo potato salad with bacon and shrimp tacos keep you fed without straining your injured hand.
- Avoid common mistakes: Do not use dirty cloths, harsh chemicals, or rush back into heavy kitchen tasks before your cut has fully healed.
Conclusion
A cut finger with a kitchen knife is painful and scary, but it does not have to be serious. With the right first aid steps, you can stop the bleeding, clean the wound, and protect it from infection in just a few minutes. Remember to stay calm, apply steady pressure, rinse the wound thoroughly, and bandage it properly. These simple actions are the foundation of effective first aid for cuts and finger wound care.
More importantly, take this experience as a chance to improve your kitchen safety habits. Use sharp knives, stable cutting boards, and proper hand positioning every time you cook. These small changes reduce the risk of future kitchen accidents and make your time in the kitchen more enjoyable and confident.
And if your finger needs a break from chopping, remember that delicious meals do not always require a knife. A no mayo potato salad with bacon, some shrimp tacos with avocado mango salsa, or a warm bowl of liver and onions with mashed potatoes can all come together with minimal cutting. Check out the recipes at no mayo potato salad with bacon, shrimp tacos with avocado mango salsa, and liver and onions with mashed potatoes for easy, satisfying meals that let your finger rest and heal.
Take care of yourself, take care of your hands, and get back to cooking with confidence. You have got this.
Frequently Asked Questions
How long does a cut finger from a kitchen knife take to heal?
A minor cut typically heals within 3 to 7 days with proper care. Clean the wound daily, keep it covered with a fresh bandage, and avoid getting it wet. Deeper cuts may take 2 to 3 weeks or longer, especially if they required stitches or medical glue. Follow your doctor’s aftercare instructions for the best healing timeline.
Should I put butter or toothpaste on a kitchen cut?
No. Butter, toothpaste, and other home remedies are not safe for open wounds. They can introduce bacteria and irritate the tissue. The best approach is to rinse the cut with cool running water, apply antibiotic ointment, and cover it with a clean bandage. Stick to proven first aid for cuts methods for safe and effective healing.
Do I need a tetanus shot after a kitchen knife cut?
If your last tetanus shot was more than five years ago, you should consider getting a booster. Kitchen knives can carry bacteria from raw food and dirty surfaces. Contact your doctor if you are unsure about your tetanus status, especially if the cut is deep or the knife was rusty or contaminated.
Can I still cook with a bandaged finger?
You can do light cooking tasks with a bandaged finger, but avoid chopping, slicing, or handling raw meat. Use waterproof bandages or gloves to keep the bandage dry and clean. For meals that require heavy knife work, try no-cook recipes like no mayo potato salad with bacon or bean salad with quinoa until your finger heals.
What is the best way to stop bleeding from a finger cut?
Apply direct pressure with a clean cloth or gauze and keep your hand elevated above your heart. Do not lift the cloth to check the wound for at least 5 to 10 minutes. Most minor cuts stop bleeding within this time. If the bleeding does not stop, seek medical attention immediately.
When should I be worried about a kitchen knife cut?
Be worried if the cut is deep, the bleeding will not stop after 10 to 15 minutes, you cannot move your finger, or you feel numbness. Signs of infection like redness, swelling, warmth, or pus also mean you need medical help. Do not ignore these symptoms. A serious hand injury from a kitchen knife needs prompt professional care.