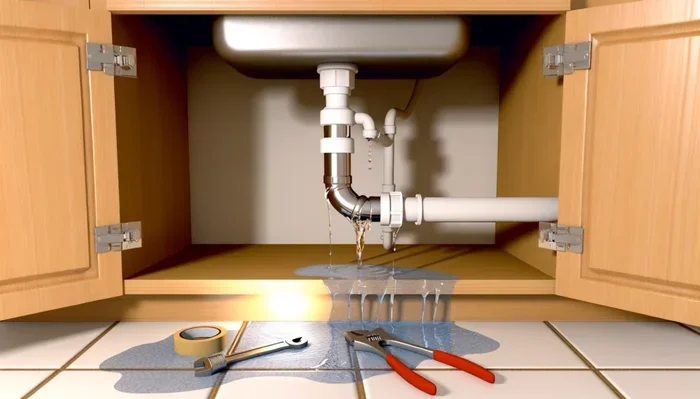
A kitchen sink leak can waste hundreds of gallons of water and cause serious damage if ignored. This guide shows you how to fix a kitchen sink leak without ever picking up the phone to call a plumber. You will learn to identify the leak source, gather the right plumbing tools, and complete simple DIY plumbing repair steps for faucets, drains, and supply lines. With basic plumber’s tape, a few replacement parts, and this walkthrough, you can tackle most leaks in under an hour.
A dripping kitchen sink is more than just an annoying sound. It wastes water, raises your utility bills, and can lead to water damage in your cabinets and floors. The good news is that most kitchen sink leak problems are easy to fix on your own. You do not need years of plumbing experience or expensive tools. With a little patience and the right guidance, you can handle this yourself.
Many homeowners panic when they see water pooling under the sink. They immediately think about calling a plumber and paying a hefty bill. But here is the truth — a surprising number of leaky sink issues come from simple causes like a loose connection, a worn-out gasket, or a dried-out sealant. This guide walks you through every step of the DIY plumbing repair process. By the end, you will feel confident tackling the fix yourself.
We will cover everything from finding the exact source of the leak to replacing faulty parts and preventing future problems. Whether your sink faucet repair involves a dripping spout or a puddle under the basin, you will find clear instructions here. Let us get started and save you money while keeping your kitchen dry.
Key Takeaways
- Identify the leak source first: Water can come from the faucet, drain, supply lines, or garbage disposal — each needs a different fix.
- Basic tools save money: A pipe wrench, plumber’s putty, plumber’s tape, and a few common items handle most repairs.
- Turn off the water supply valve: Always shut off water before starting any repair to prevent flooding and water damage.
- Replace worn parts cheaply: Worn gaskets, cartridges, and O-rings are the most common culprits and cost just a few dollars.
- Prevent future leaks: Regular maintenance, gentle handling of faucets, and checking connections monthly keeps your sink leak-free.
- Know when to call a pro: Some leaks involve corroded pipes or main line issues that need a licensed plumber.
📑 Table of Contents
- Why Kitchen Sinks Leak in the First Place
- Tools and Materials You Need for the Fix
- Step-by-Step Guide to Fixing a Kitchen Sink Leak
- Common Mistakes to Avoid When Fixing a Sink Leak
- How to Prevent Future Kitchen Sink Leaks
- When to Call a Professional Plumber
- Cost Comparison: DIY vs. Hiring a Plumber
- Key Takeaways
- Conclusion
Why Kitchen Sinks Leak in the First Place
Understanding why a kitchen sink leak happens helps you fix it correctly the first time. Water leaks usually come from one of a few common areas. Each area has its own set of causes and solutions. Let us break them down so you can pinpoint your problem quickly.
Worn-Out Faucet Cartridges and O-Rings
The most frequent cause of a leaky faucet is a worn cartridge or O-ring. These small rubber or plastic parts create a seal inside your faucet. Over time, they degrade from daily use, mineral buildup, and normal wear. When they fail, water seeps past the seal and drips from the spout or handle.
If you notice water dripping even when the faucet is off, the cartridge or O-ring is likely the culprit. Replacing these parts is one of the simplest sink faucet repair jobs. A new cartridge costs just a few dollars, and most hardware stores carry them in stock.
Loose or Damaged Supply Line Connections
Your sink has two supply lines — one for hot water and one for cold. These connect to the shutoff valves under the cabinet. Over time, vibrations from daily use can loosen these connections. Threads can also corrode, especially in older homes with galvanized steel pipes.
A loose supply line connection often causes water to pool right under the sink. Sometimes the leak is slow and barely noticeable. Other times, it sprays water every time you turn on the tap. Tightening the connection or replacing the supply line usually solves this problem fast.
Cracked or Damaged Sink Basin and Drain
Sometimes the leak comes from the sink itself. A crack in the basin or a damaged drain flange can let water escape. This type of under sink leak is less common but still important to address. Hairline cracks can be hard to spot, so always dry the area thoroughly and look for moisture patterns.
Drain connections also loosen over time. The putty or plumber’s sealant that holds the drain in place can dry out and crack. When this happens, water leaks around the drain basket or the P-trap underneath.
Garbage Disposal Seal Failures
If your sink has a garbage disposal, the seal between the disposal and the sink can wear out. This creates another common source of a kitchen sink leak. Food debris and grease build up around the flange, slowly breaking down the rubber gasket. Water then leaks from the connection point.
Checking the garbage disposal flange is easy. Simply run water and look closely at the seam where the disposal meets the sink. If you see water dripping from that joint, the flange gasket needs replacement.
Tools and Materials You Need for the Fix
Before you start any DIY plumbing repair, gather your supplies. Having everything ready saves time and keeps you from running back and forth to the hardware store. Most of what you need costs very little and lasts for multiple repairs.
Essential Plumbing Tools
- Adjustable wrench or pipe wrench — for tightening and loosening nuts on supply lines and drain connections
- Plumber’s putty — a soft, pliable sealant used around drains and faucets
- Plumber’s tape (Teflon tape) — wraps around threaded connections to create a watertight seal
- Screwdriver set — both flathead and Phillips head for handles and escutcheons
- Bucket and towels — to catch residual water and clean up spills
- Flashlight — helps you see dark spaces under the sink clearly
Replacement Parts to Keep on Hand
For a proper sink faucet repair, you may need one or more of these parts:
- Faucet cartridge — match the model number of your faucet for the correct fit
- O-rings and gaskets — available in small packs at any hardware store
- Compression fitting rings — used on supply line connections
- Drain flange gasket — for garbage disposal and drain connections
- Plumber’s putty or silicone sealant — for resealing drain baskets and faucets
Quick Tip: Take a photo of the parts you are removing before you toss them. This makes it much easier to match replacements at the store. Also, bring the old part with you if possible.
Step-by-Step Guide to Fixing a Kitchen Sink Leak
Now that you know the common causes and have your tools ready, let us walk through the actual repair process. Follow these steps carefully, and you will have your kitchen sink leak resolved in no time.
Step 1: Turn Off the Water Supply
This is the most important step in any plumbing leak repair. Locate the water supply valves under the sink. Turn both the hot and cold valves clockwise to shut them off. Once closed, open the faucet to release any remaining water pressure in the lines.
Place a bucket under the supply lines before you disconnect anything. This catches any leftover water and keeps your workspace dry. A dry workspace makes it much easier to find the actual leak source.
Step 2: Identify and Dry the Leak Area
Use a towel or rag to dry every surface under the sink completely. Then run the water briefly while someone watches from below. Look for where water first appears. Mark that spot with a piece of tape or a dry erase marker so you can focus your attention there.
Common leak spots include:
- The base of the faucet where it meets the sink
- Supply line connections at the shutoff valves
- The P-trap and drain assembly
- The garbage disposal flange
Step 3: Disassemble and Inspect the Problem Area
Once you have located the leak, carefully disassemble the parts around it. Use your pipe wrench to loosen nuts, but do not force anything. Over-tightening can crack plastic fittings and make the problem worse.
Inspect each part as you remove it. Look for cracks, corrosion, mineral deposits, and worn rubber seals. If a part looks damaged or deformed, replacement is the best option. In many cases, a simple compression fitting replacement or a new O-ring solves the entire problem.
Step 4: Replace or Repair the Faulty Component
Depending on what you found, follow the specific repair for your situation:
For a leaking faucet handle or spout: Remove the handle screw, pull off the handle, and extract the cartridge. Compare the old cartridge to the new one to ensure a perfect match. Insert the new cartridge, replace the O-rings with fresh ones, and reassemble everything. Apply a thin layer of plumber’s putty around the base if needed.
For a leaking supply line connection: Disconnect the supply line from the valve and the faucet tailpiece. Clean the threads with a rag, wrap three to five layers of plumber’s tape clockwise around the male threads, and reconnect. Hand-tighten first, then snug with the wrench — no more than a quarter turn past hand-tight.
For a leaking drain or P-trap: Empty the P-trap into a bucket, remove it, and clean off old putty. Apply fresh plumber’s putty around the drain flange, press it into place, and reinstall the P-trap. Tighten the slip-joint nuts by hand and give them a slight snug with the wrench.
For a garbage disposal flange leak: Remove the splash guard, access the flange from above, and scrape away old putty. Apply new plumber’s putty around the flange, reinstall the disposal, and tighten the mounting screws evenly. Run water and check for leaks.
Step 5: Test Your Repair
After reassembling everything, turn the water supply valves back on slowly. Open the faucet and let it run for a full minute. Watch the repair area carefully for any signs of dripping or moisture. Use a dry paper towel to wipe down connections — this helps reveal even tiny leaks that are hard to see.
If everything stays dry, congratulations! Your DIY plumbing repair is complete. Place a dry cloth under the sink and check again in a few hours. If the area remains dry, you have successfully fixed the leak.
Common Mistakes to Avoid When Fixing a Sink Leak
Even simple repairs can go wrong if you make common mistakes. Avoid these pitfalls to ensure a lasting fix for your kitchen sink leak.
Over-Tightening Connections
One of the biggest mistakes people make is over-tightening nuts and fittings. This is especially true with plastic parts. Over-tightening cracks the fitting and creates a worse leak than the one you started with. Always hand-tighten first, then use the wrench for just a small additional turn.
Using the Wrong Sealant
Not all sealants work for every application. Plumber’s putty is great for drains and faucet bases but should never be used on plastic threads. Teflon tape works well on threaded connections but does not replace putty for flat surfaces. Using the wrong sealant leads to leaks that come back within days.
Skipping the Dry Test
Many people reassemble everything, turn the water on, and walk away. If a small drip is hiding in a hard-to-see spot, you will not notice until water damage has already started. Always do a thorough dry test with paper towels and a flashlight. Check again after a few hours.
Ignoring Corroded Pipes
If your supply lines or drain pipes show signs of corrosion, replacing the gasket or fitting alone will not solve the problem. Corroded pipes need full replacement. A corroded pipe is a ticking time bomb for future leaks and water damage. Address it now rather than dealing with a bigger problem later.
How to Prevent Future Kitchen Sink Leaks
Once you have fixed your kitchen sink leak, you want to make sure it does not come back. Prevention is simple and only takes a few minutes each month. A little regular maintenance goes a long way toward keeping your sink dry and your water bill low.
Check Connections Monthly
Get into the habit of inspecting your supply line connections and drain joints once a month. Look for any signs of moisture, mineral deposits, or corrosion. Catching a small drip early prevents it from becoming a big problem. Keep a dry paper towel in your cabinet and wipe down the area during your check.
Use Gentle Pressure on Faucets
Rough handling of your faucet handles causes internal parts to wear out faster. Turn the handles gently and avoid forcing them past the off position. This simple habit extends the life of cartridges, O-rings, and seals significantly.
Clean Your Garbage Disposal Properly
Grease and food debris buildup damages the garbage disposal flange seal over time. Avoid pouring grease down the drain. Run cold water while running the disposal, and clean the splash guard regularly. A well-maintained disposal is far less likely to develop a leaky sink at the flange.
Replace Old Parts Proactively
If your home has older plumbing, consider replacing supply lines and drain components before they fail. Rubber hoses inside supply lines degrade over time and can burst without warning. Stainless steel braided supply lines last much longer and provide better protection against water damage.
When to Call a Professional Plumber
Most kitchen sink leak repairs fall into the DIY category. But some situations call for a licensed professional. Knowing when to make that call saves you from making the problem worse and protects your home from serious water damage.
Call a plumber if you notice any of the following:
- Water is coming from inside the wall behind the sink
- The pipes under your sink are severely corroded or showing signs of pinhole leaks
- You have tried the repair but the leak returns within a day or two
- The leak involves the main water line or the home’s drainage system
- You notice mold or mildew developing around the sink area
A professional plumber has the experience and tools to handle complex issues safely. While a typical plumber cost for a service call ranges from $100 to $300, it is worth it when the repair goes beyond simple DIY fixes. Trying to force a repair you are not comfortable with can lead to costly water damage that far exceeds the cost of a service call.
Expert Insight: Many plumbers offer free estimates for simple repairs. Call around and ask for a quick phone consultation. You might find that the repair is simpler — and cheaper — than you expected. This also helps you understand what the professional will do, which is useful knowledge for future maintenance.
Cost Comparison: DIY vs. Hiring a Plumber
One of the biggest reasons homeowners choose to fix a kitchen sink leak themselves is cost. Let us look at how the expenses compare.
| Repair Type | DIY Cost | Plumber Cost | Savings |
|---|---|---|---|
| Faucet cartridge replacement | $5-$15 | $150-$300 | $135-$285 |
| Supply line tightening or replacement | $5-$20 | $100-$250 | $80-$230 |
| Drain P-trap replacement | $5-$15 | $120-$200 | $105-$185 |
| Garbage disposal flange gasket | $5-$10 | $100-$200 | $90-$190 |
| Full sink drain resealing | $10-$25 | $150-$350 | $125-$325 |
As you can see, DIY plumbing repair saves a significant amount of money. The only real investment is your time and a few basic tools. Most repairs take less than an hour from start to finish. That is a much better use of your Saturday morning than waiting around for a plumber’s appointment.
Key Takeaways
- Identify the leak source first: Water can come from the faucet, drain, supply lines, or garbage disposal — each needs a different fix.
- Basic tools save money: A pipe wrench, plumber’s putty, plumber’s tape, and a few common items handle most repairs.
- Turn off the water supply valve: Always shut off water before starting any repair to prevent flooding and water damage.
- Replace worn parts cheaply: Worn gaskets, cartridges, and O-rings are the most common culprits and cost just a few dollars.
- Prevent future leaks: Regular maintenance, gentle handling of faucets, and checking connections monthly keeps your sink leak-free.
- Know when to call a pro: Some leaks involve corroded pipes or main line issues that need a licensed plumber.
Conclusion
Fixing a kitchen sink leak does not have to be scary or complicated. Most leaks come from simple causes that any homeowner can address with basic tools and a little patience. Whether it is a worn cartridge, a loose supply line, or a failing drain gasket, the steps are straightforward and the savings are significant.
By following the guide above, you can complete a successful DIY plumbing repair and avoid the cost and wait time of scheduling a plumber. The key is to take your time, identify the exact source of the leak, and use the right parts and sealant for the job. A little prevention goes a long way too — regular checks and gentle use keep your sink running smoothly for years.
Now that you know how to handle a leaky sink, you have the power to protect your home from water damage and keep your utility bills low. Grab your tools, find that leak, and get it fixed today. Your wallet — and your kitchen floor — will thank you.
Frequently Asked Questions
What causes a kitchen sink to leak from the bottom?
A leak from the bottom of the sink is usually caused by a worn drain gasket, cracked sink basin, or deteriorated plumber’s putty around the drain flange. Inspect the area carefully, dry it completely, and run water to pinpoint the exact source. Most bottom leaks are easy to fix by replacing the gasket or resealing with fresh putty.
How do I know if my kitchen sink leak is serious?
A small drip from a supply line connection is usually minor and easy to fix. However, if you see water spraying, constant pooling, or signs of water damage like warping cabinets or mold growth, the leak is serious and needs immediate attention. When in doubt, turn off the water supply and consult a professional.
Can I use plumber’s tape instead of plumber’s putty for a sink drain?
No, plumber’s tape and plumber’s putty serve different purposes. Teflon tape seals threaded pipe connections, while plumber’s putty seals flat surfaces like drain flanges and faucet bases. Using the wrong one will not create a proper watertight seal and the leak will return quickly.
How much does it cost to fix a kitchen sink leak yourself?
The DIY cost is typically between $5 and $25 for replacement parts like cartridges, O-rings, gaskets, and putty. The only other investment is basic tools you may already own. This compares to $100-$350 or more if you hire a plumber for the same repair.
What should I do if the leak keeps coming back after I fix it?
A recurring leak usually means the root cause was not fully addressed. The replacement part may be defective, the connection may need more tightening, or there may be a second leak you missed. Disassemble the area again, inspect all parts carefully, and ensure every connection is properly sealed. If the problem persists, it is time to call a licensed plumber.
How long does it take to fix a kitchen sink leak?
Most simple kitchen sink leak repairs take between 30 minutes and one hour. Faucet cartridge replacements and supply line tightening are quick jobs. More complex repairs like drain resealing or garbage disposal flange replacement may take up to two hours, especially if you are doing the work for the first time.